A Writing Box
I've wanted a writing slope/box for a while. There are a lot of very fancy expensive ones, and a lot of old worn out broken ones. I bought an old broken one and fixed it up. Here's how.
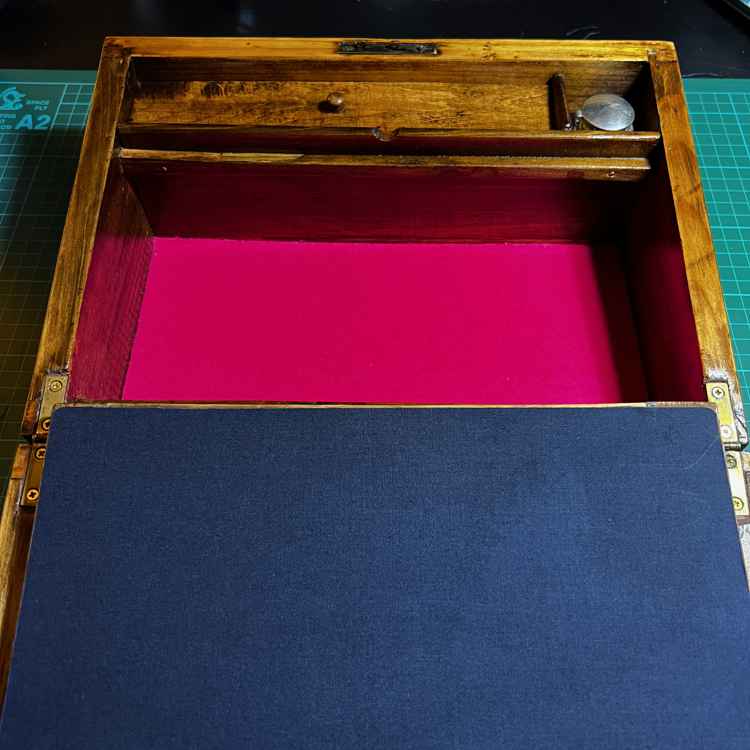
Closed, they look like a nice box, a bit of fancy veneer work on the outside, and a keyhole on the front. Open it and you see the two parts of the box both have their own lids, and there’s a space in the bottom one for inkwells and pens. The lids are the writing boards, the bits that have a fabric covering to make it pleasant to write on. Under these boards there will be some writing paper, blotting paper, wax and (later on) envelopes and stamps. The boards themselves are joined to each other across the main box hinge to make a flat padded writing surface.
I really like the idea of old writing slopes. They’re the laptops of the past! I have this vague romantic idea I would have one and slide it towards me on my beautifully clear desk to write letters. If you saw my desk you’d see how laughable the idea is. It’s a mess, barely room for my coffee never mind a fancy writing box.
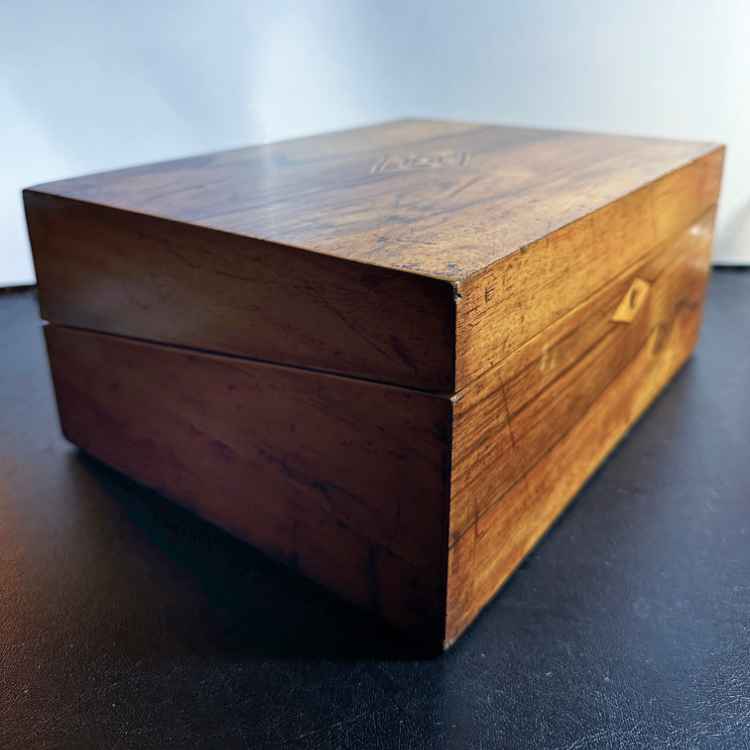
I bought the one below, these are images from the original listing.
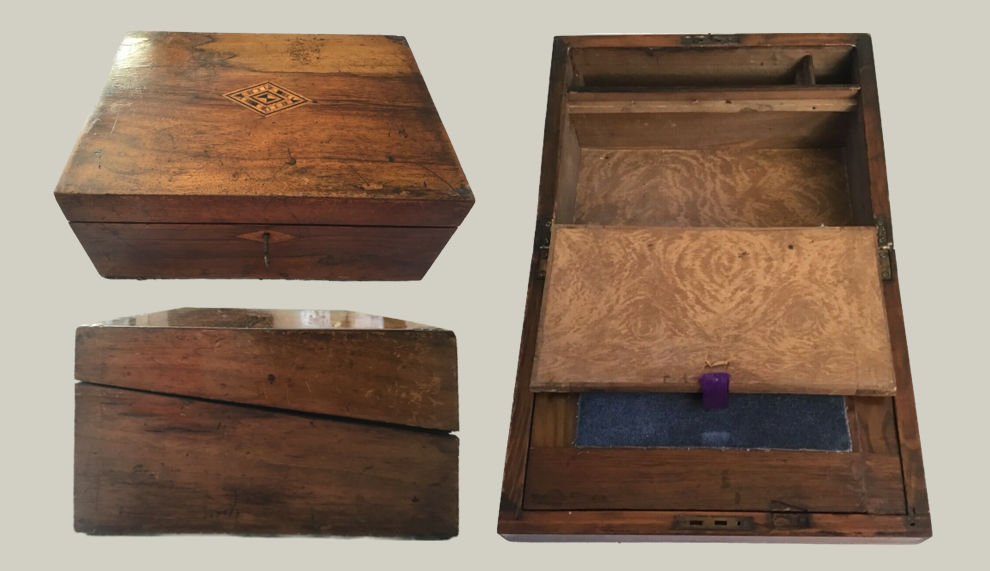
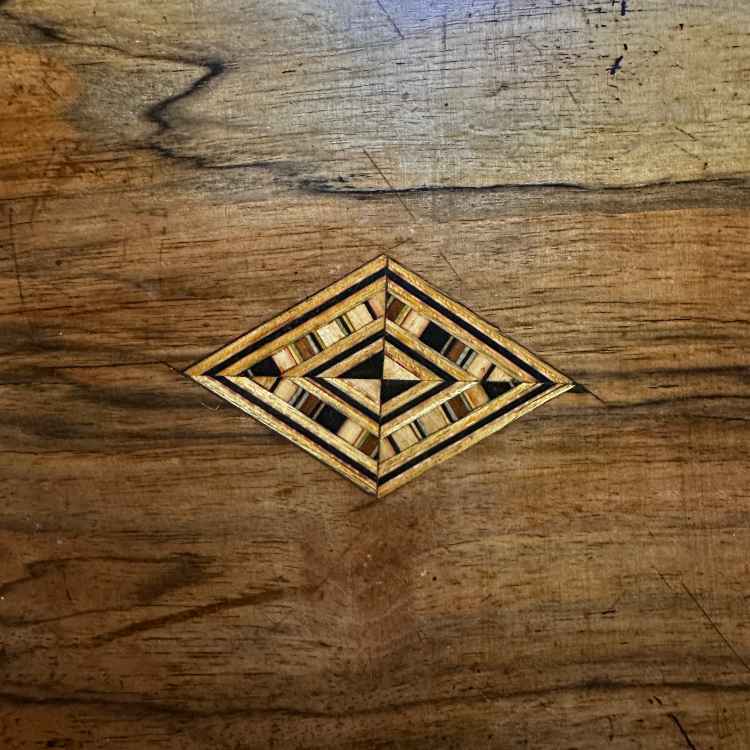
It looks nice, but not too fancy. I have no history for it, but it doesn’t look like the work of a master carpenter (which is good, so I don’t feel so responsible if I screw it up). Perhaps it was an apprentice piece or made by someone for their own use or as a learning project. The marquetry on top is very nice, but you can see a few places where you’d guess they were learning how to do it. I didn’t want to damage or alter that at all, it felt like the bit whoever made it cared about and was hopefully proud of, and I’m very fond of it too. Whatever it was made as, it’s had a very hard life since then and looks like someone else has tried to fix it later, with lots of glue. And wood filler. And nails. Nails that don’t look like nails.
The plan
I want the box to be functional again and pleasant to use, and I wanted to keep the marquetry intact. This is the big list of things to fix.
- The main hinges for the box look bent and the box doesn’t close properly.
- There are some chips to the veneer that I’d like to patch up.
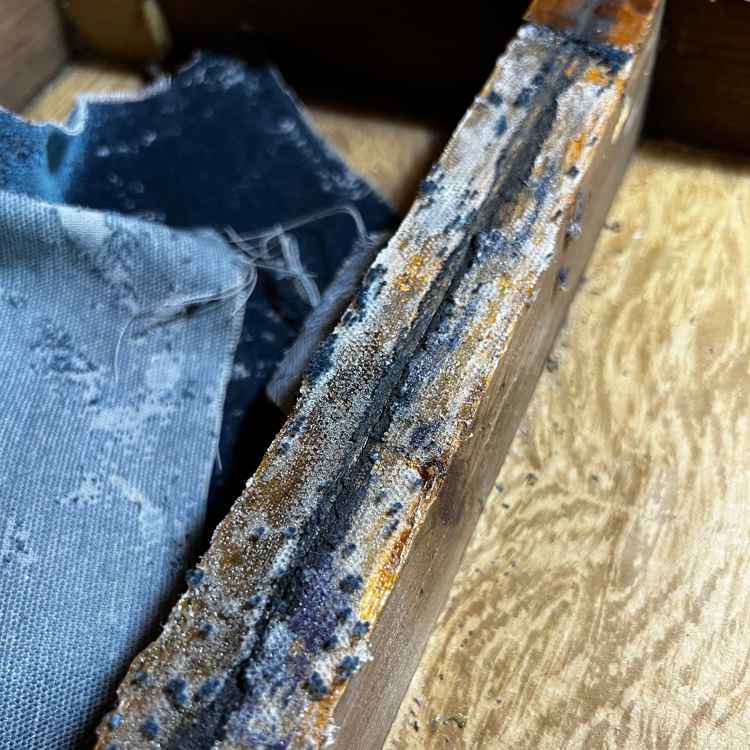
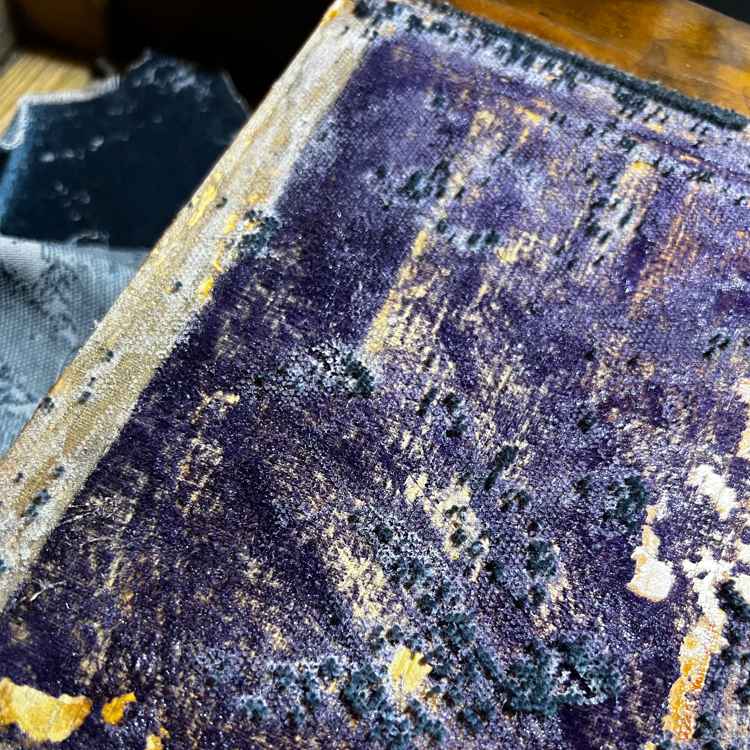
- The writing surface needs replacing. It’s a dirty old velvet and was very uneven around the hinge, frayed around the edges and coming loose in places.
- Also, the writing surface is the hinge for the writing boards, and it’s not holding up well, very loose and wobbly.
- The felt on the bottom of the box is dirty and torn, so that needs renewing.
- There’s no catch to hold the writing boards, so the ‘top’ one flaps open when you open or close the box.
- The writing boards have no way to open them without tilting the whole box.
- The lining inside the two compartments is coming loose and is torn.
- There’s a lid for where the pens go but it looks like it’s sitting too low, like something is missing from underneath.
- There’s a space for an inkwell, but no inkwell.
- It’s so dirty. So, so dirty. It smells.
Dismantle!
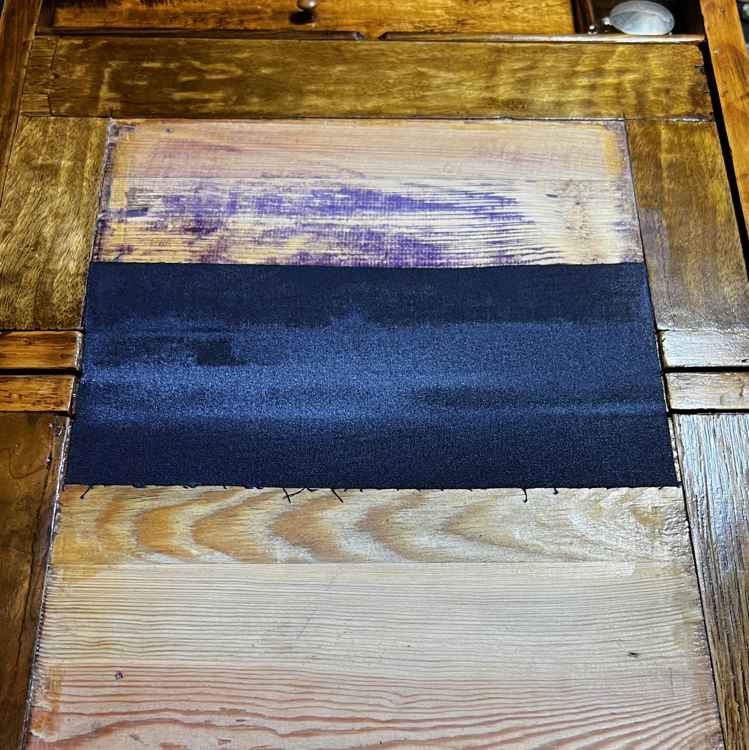
To fix things I need to break things. The first thing is to take out the writing boards. They’re held in place by the velvet writing surface glued to the tops of the back boards of the box. They came off easily. I then removed the velvet from the boards which was easy, but it left all the weird glue they used on the boards.
I used acetone to remove the glue. While I was at it I used acetone to remove the felt from the underside of the box. That felt is to protect the surface of any table it’s sat on from scratches and to make it slide around more easily. I’ll put new felt on at the very end of the project. I also removed the lining paper inside the box.
And while I was at it with the acetone I gave the outside of the box a good clean and it removed all the dismal gunk that had stuck to it over the years. I was careful not to damage the bit of marquetry.
The hinges
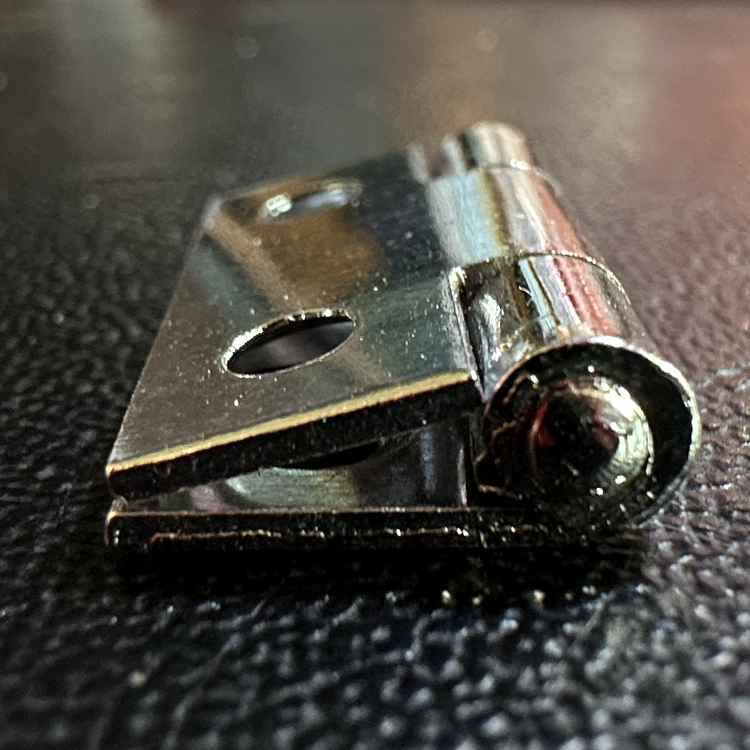
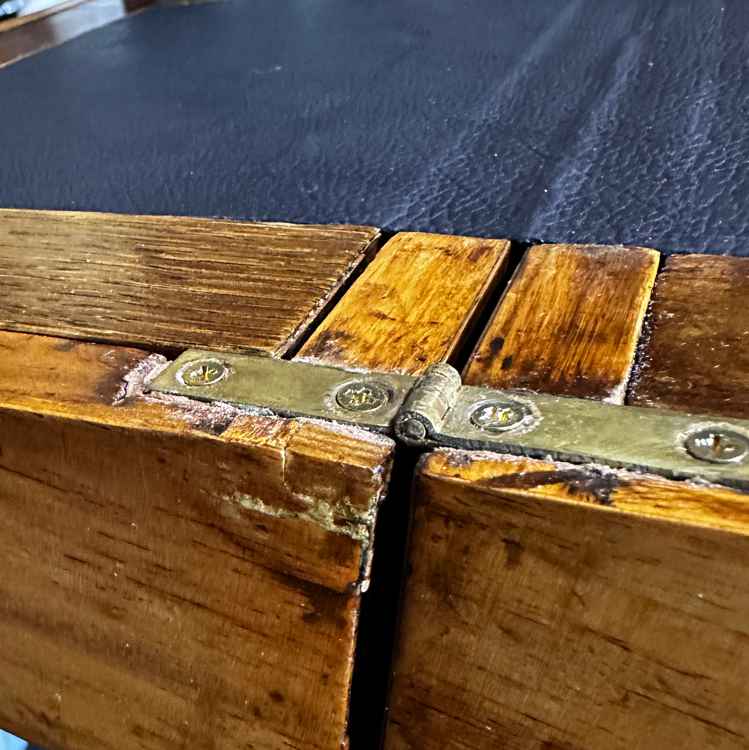
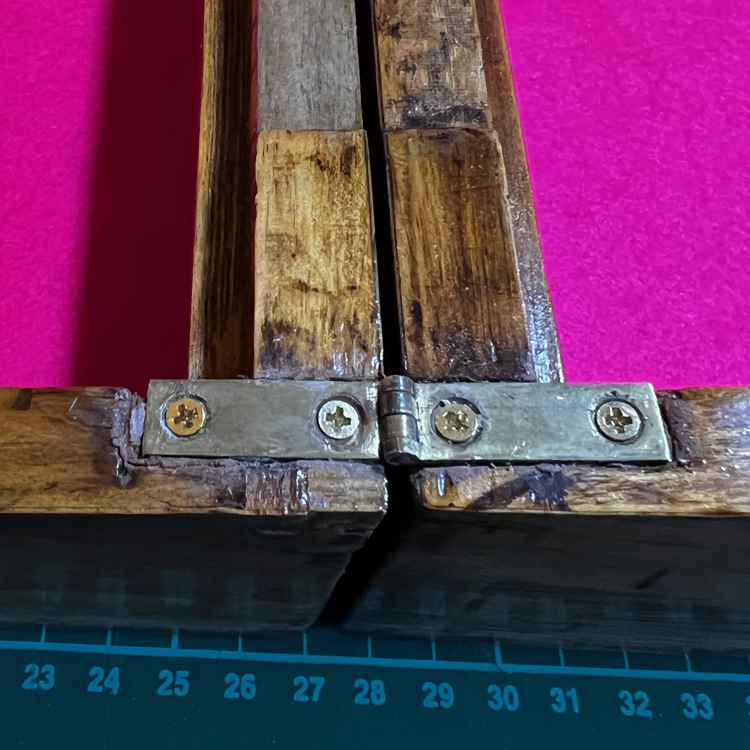
This was a revelation. The hinges were on wonky and had bent slightly so the box didn’t close very well, you had to apply sidewards pressure to get the lock to engage. The hinges looked like they were attached with screws. They look like screws, don’t they?
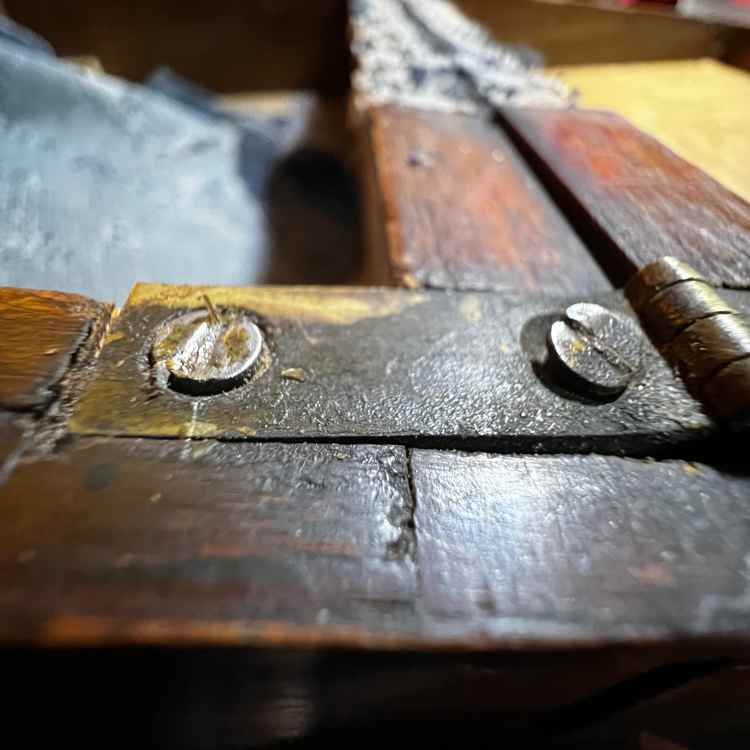
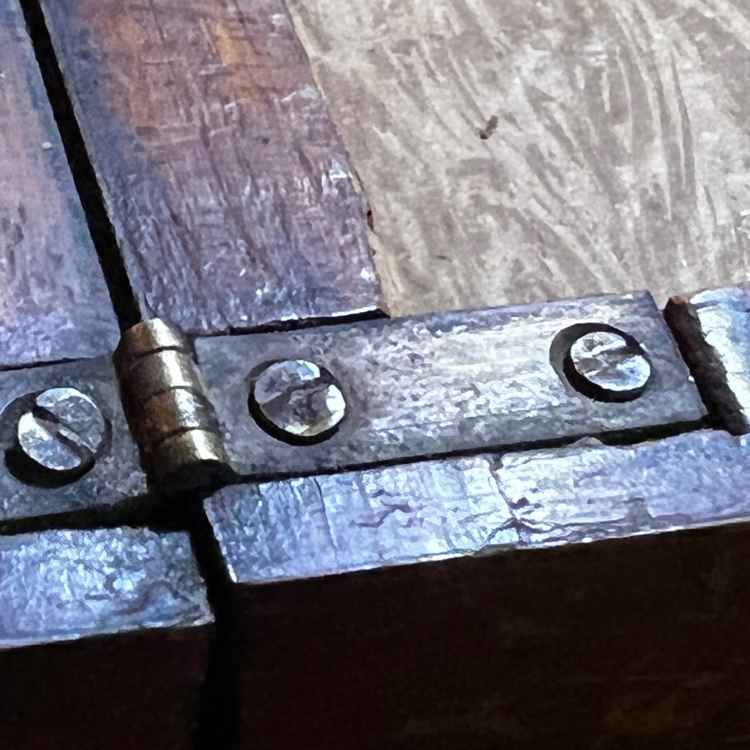
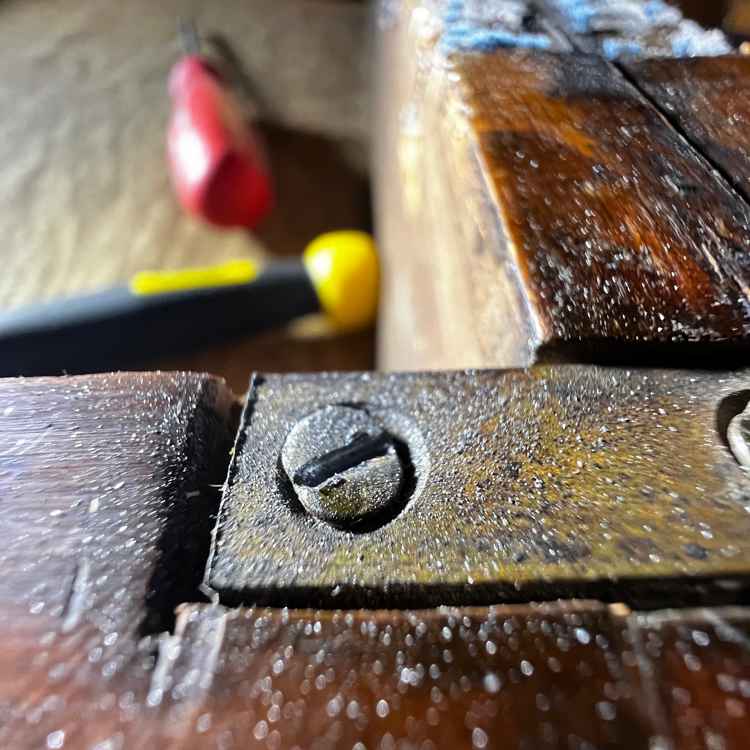
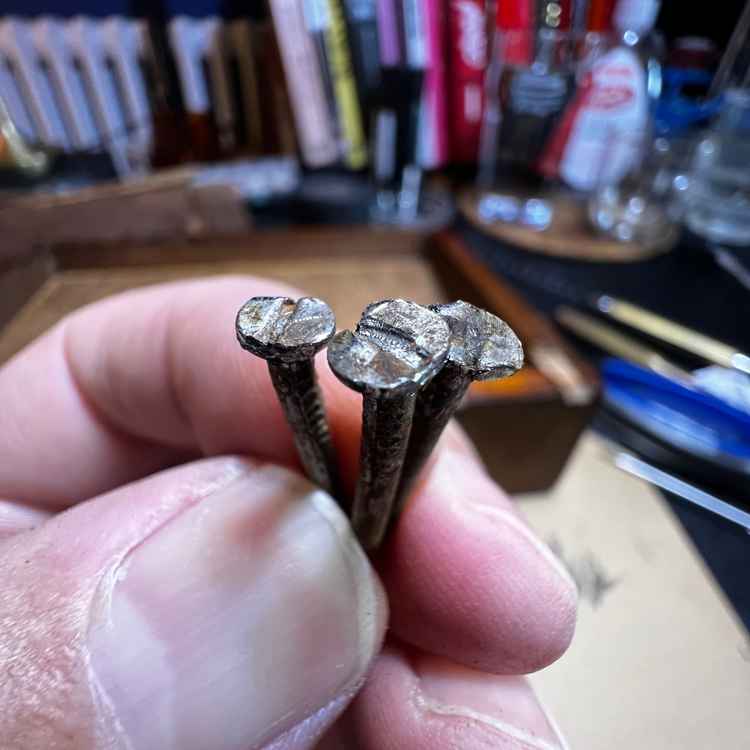
Well, no. I’m sure there are expert restorers who would look at these and go “ah, these are clearly Mark IV Robertson Ship Nails” or something and chuckle at my attempts to unscrew the bloody things.
Yes, they’re nails. All it took was a sharp tug with pliers and out they came.
The hinges were bent and I thought it’d be a straightforward job to get replacements. Long story short, no it wasn’t.
A brief whinge. If you’re selling hinges, include some pictures of the hinge open, and some pictures of the hinge closed. Show it from the top, show it from the side. You have the hinges, you’re taking a picture anyway, do us all a favour and take enough pictures so we know what it is you’re selling. Include measurements. How far the screws are apart, what gauge of screw is needed to attach the hinge to anything. It’s not much to ask.
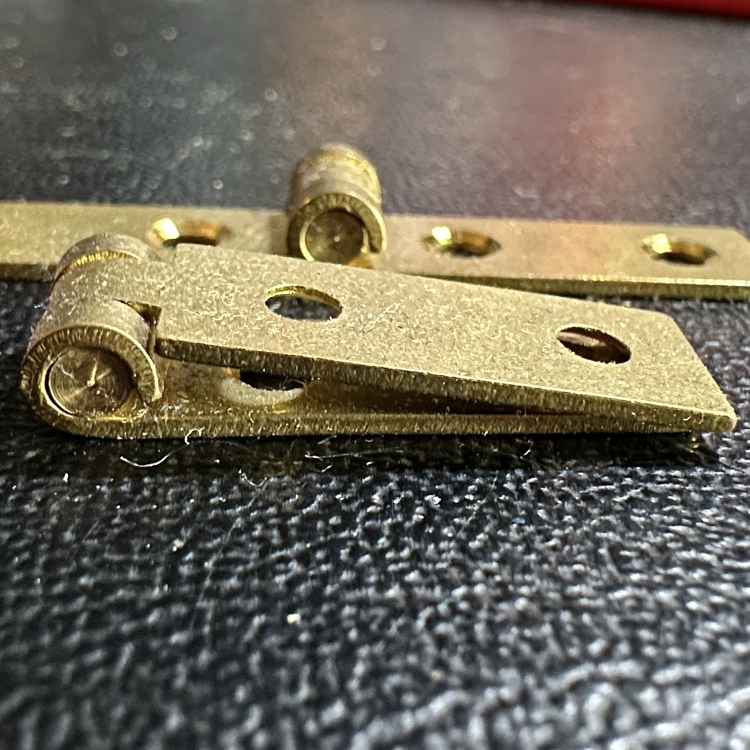
I bought some hinges above, and found that it’s a weird idea for hinges to open flat and close flat. I was surprised. For a writing slope, both are pretty vital. Pictures, people. Take pictures.
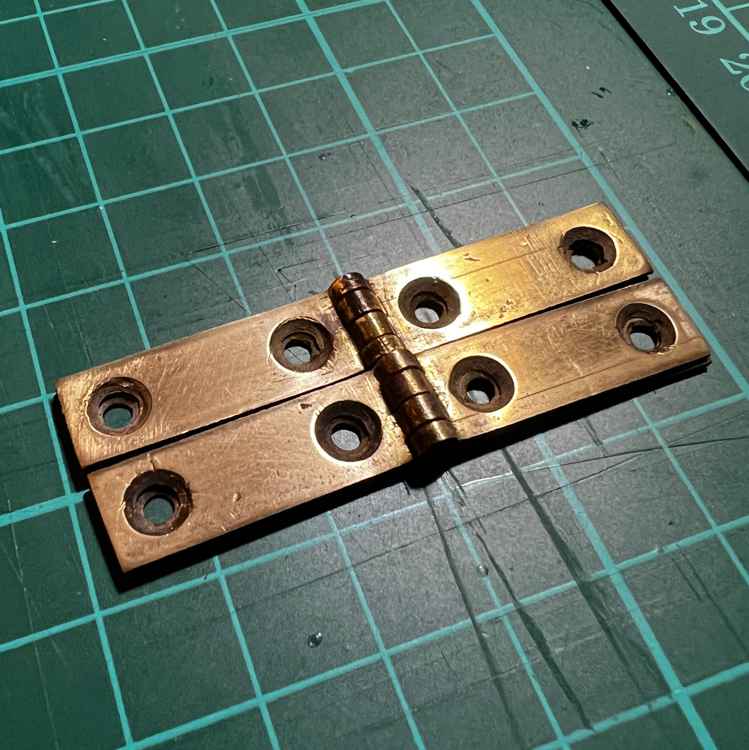
I ended up repairing and cleaning the old hinges, before and after above. I have some woodworking clamps and some flat bits of metal so I was able to rig something up to flatten and realign the bent bits of the hinges.
More dismantling
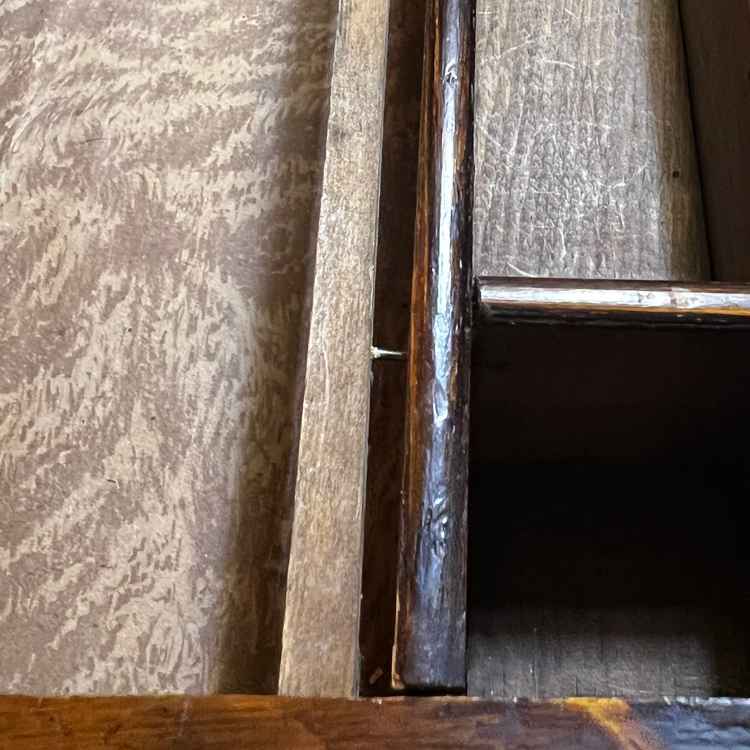
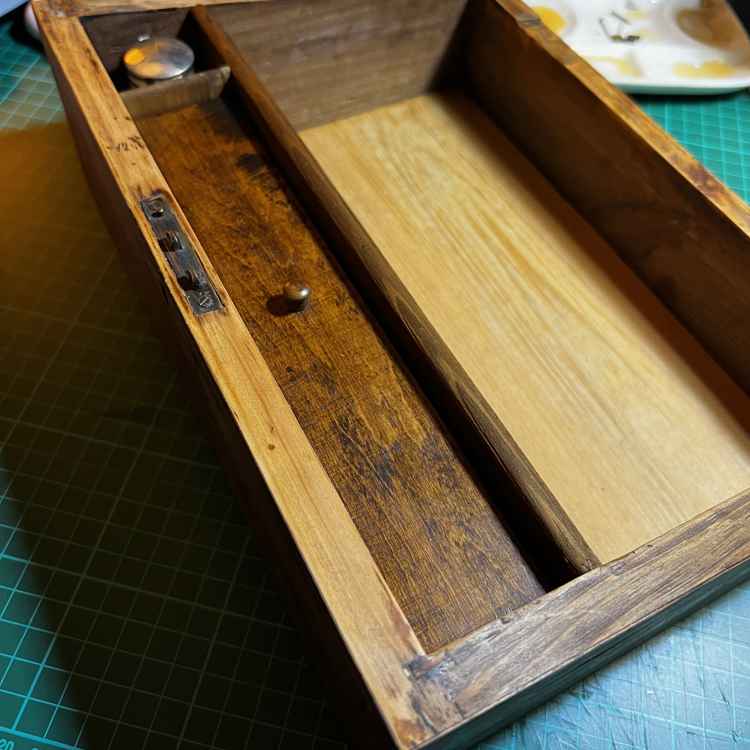
The bottom half of the box has the bit where the pens and inkwell go. This bit looked like it’d been broken at some point.

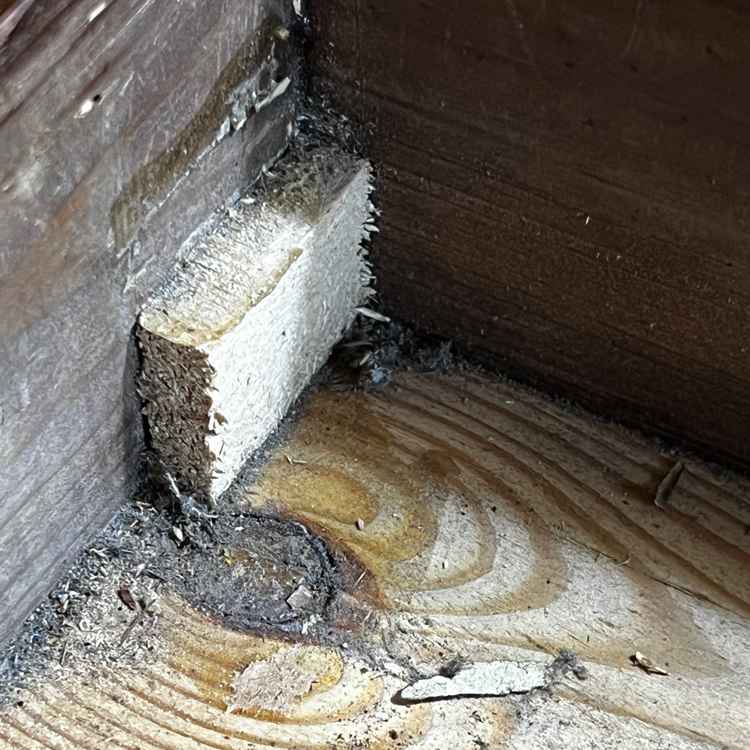
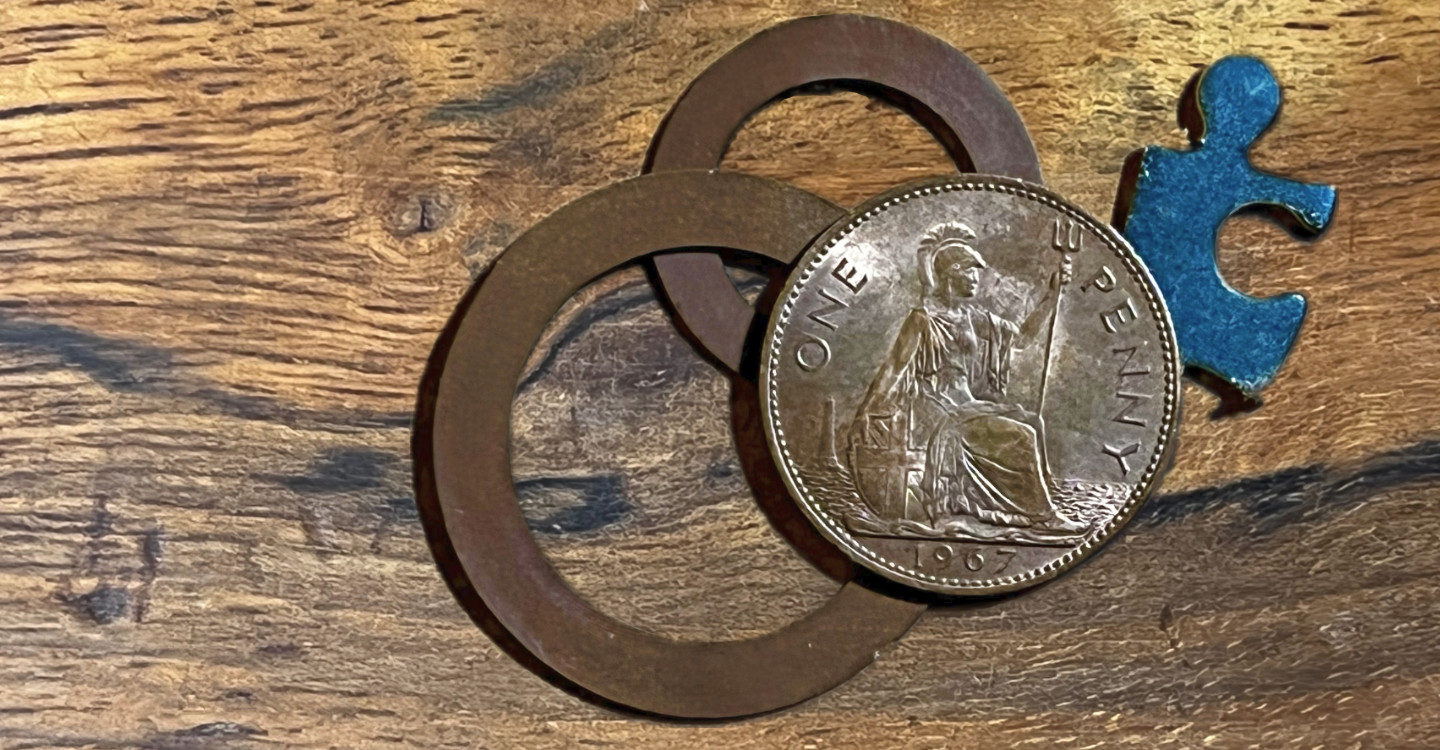
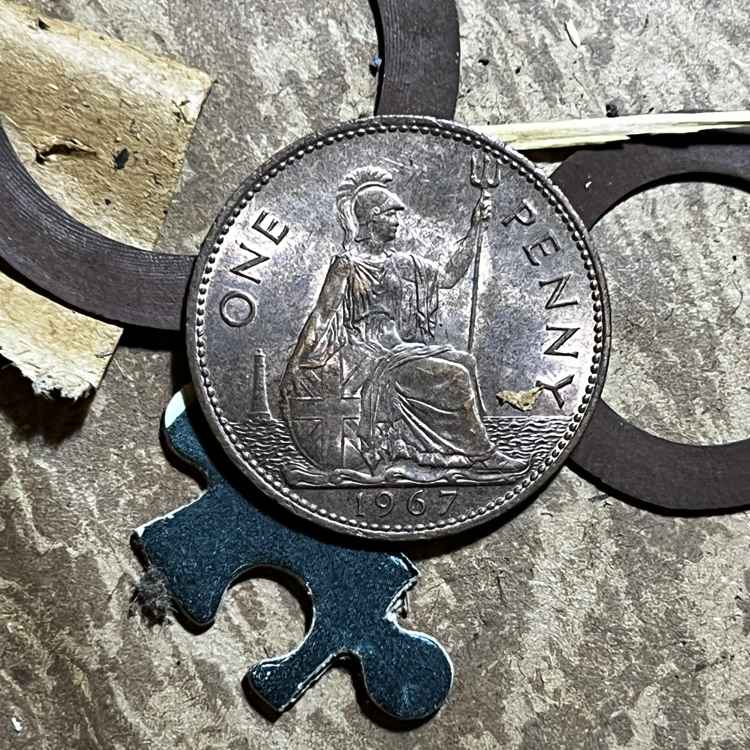
Lots of glue, some nails here and there, a few gaps where the wood had split and some rough blocks of wood glued in to shore it all up. When I took it all out I found a jigsaw piece, some washers and a penny! I kept the penny aside so I could put it back in the box somehow when I put it all back together. Maybe it means something.
Construction!
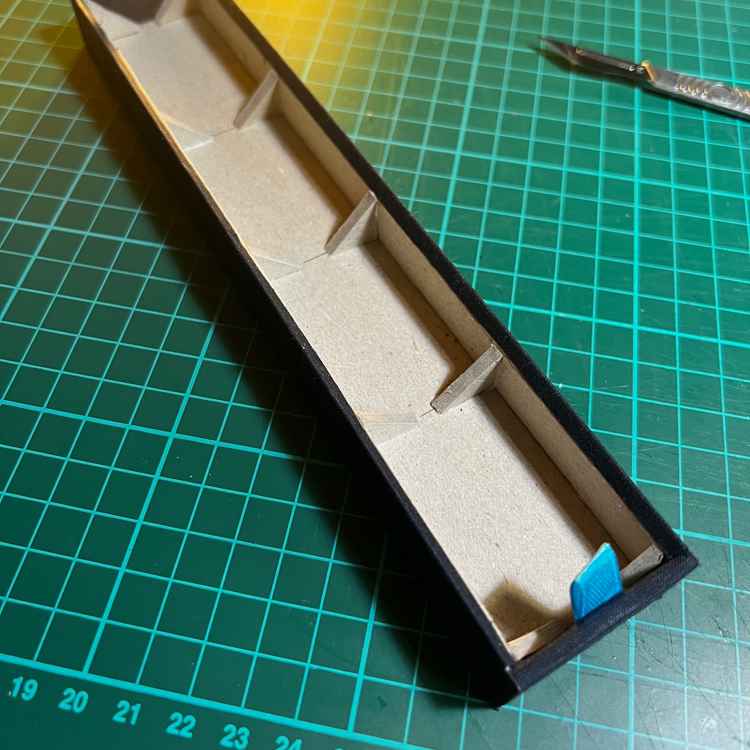
I wanted the pen tray to feel nice to use, and with a fair bit of height available I decided to do a double decker pen tray. For the bottom tier I made a straightforward box out of greyboard and lined it with paper and bookbinding fabric. I had a few attempts at this to get the sizing right as I wasn't sure at this point how big the inkwell space needed to be and whether I would keep the wooden blocks as 'stabilisers' for the uprights.

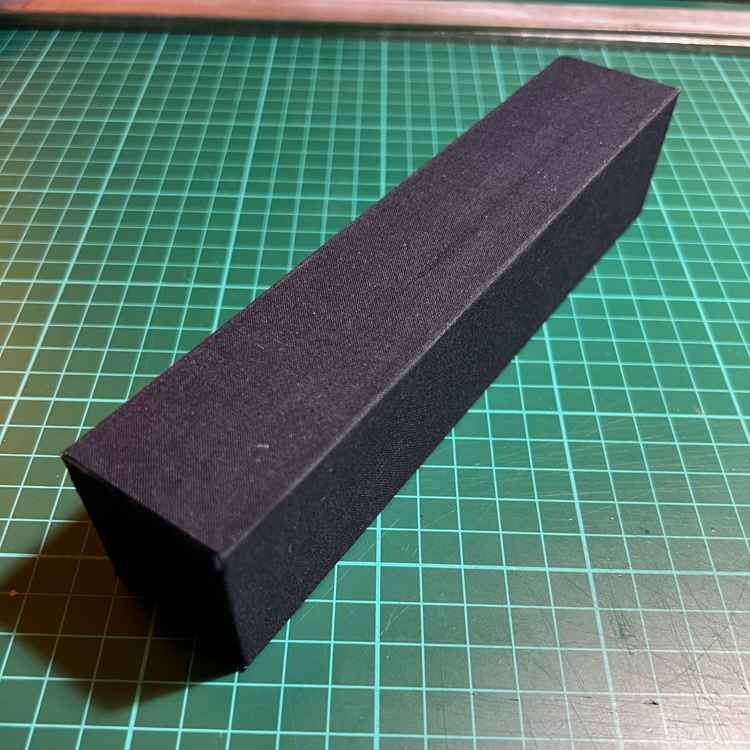

I made a prototype to check the sizing, then built the actual box. This was easier with all the practice I had from doing the advent calendar.
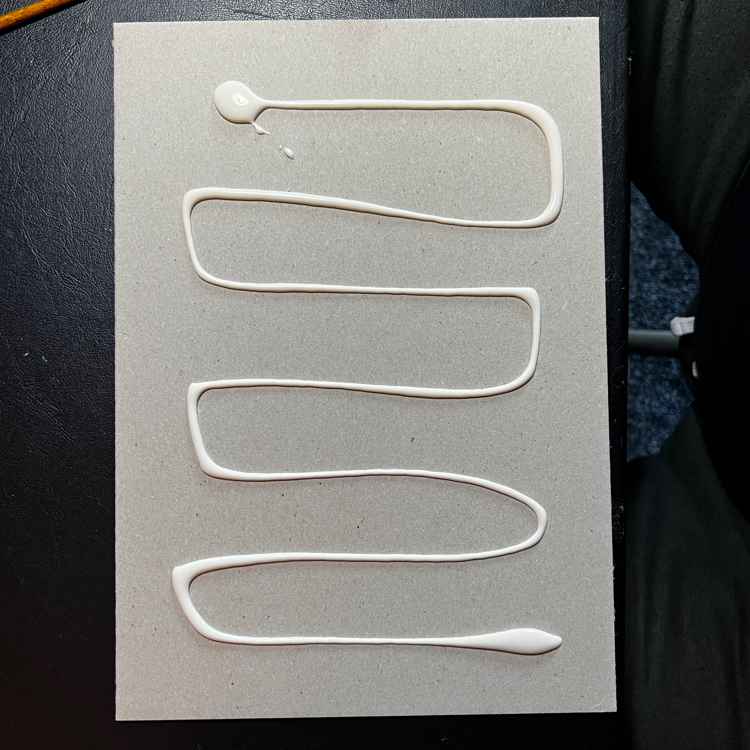
For some reason I didn't take many pictures of making the bits of this. The glue pic I liked the quality of the line the glue made, but I think it's actually when I made the base box.


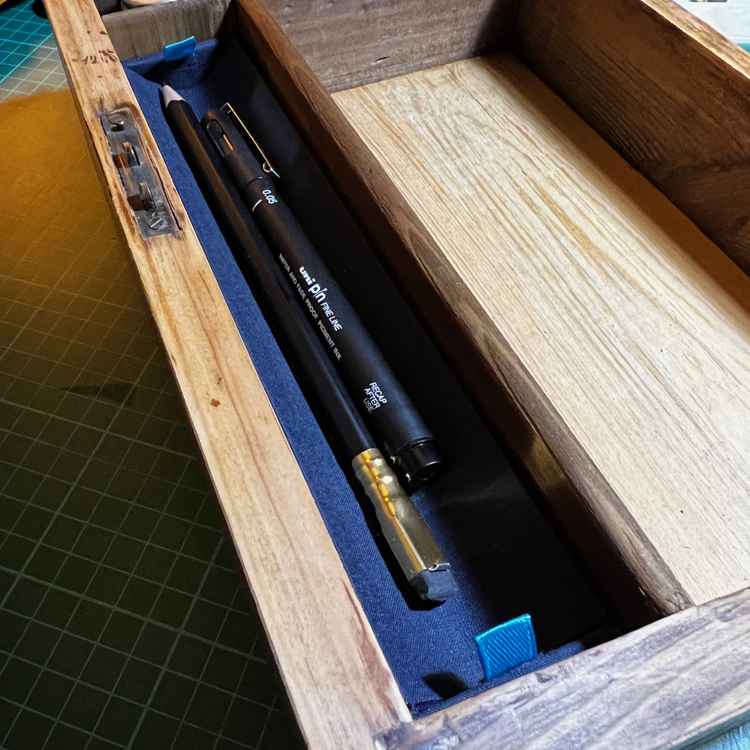
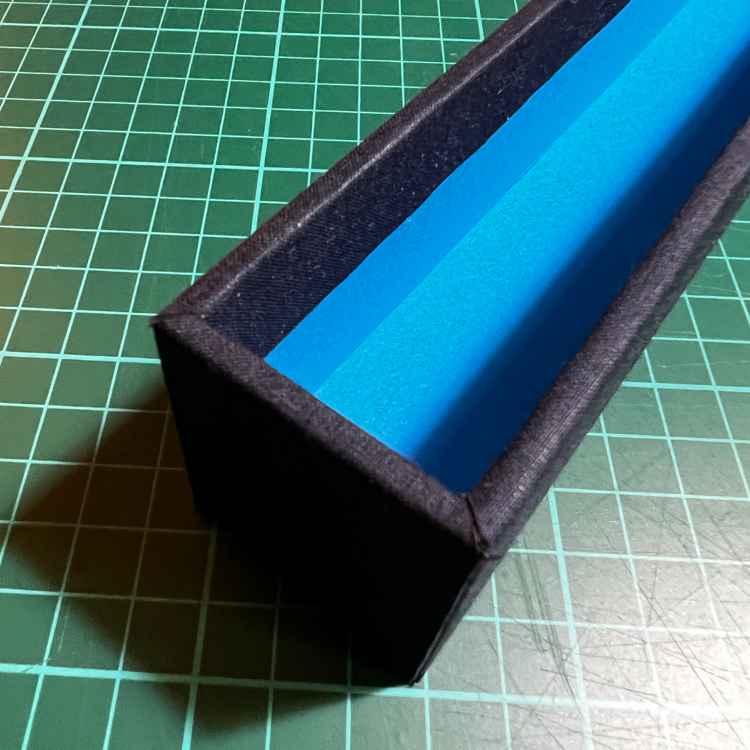
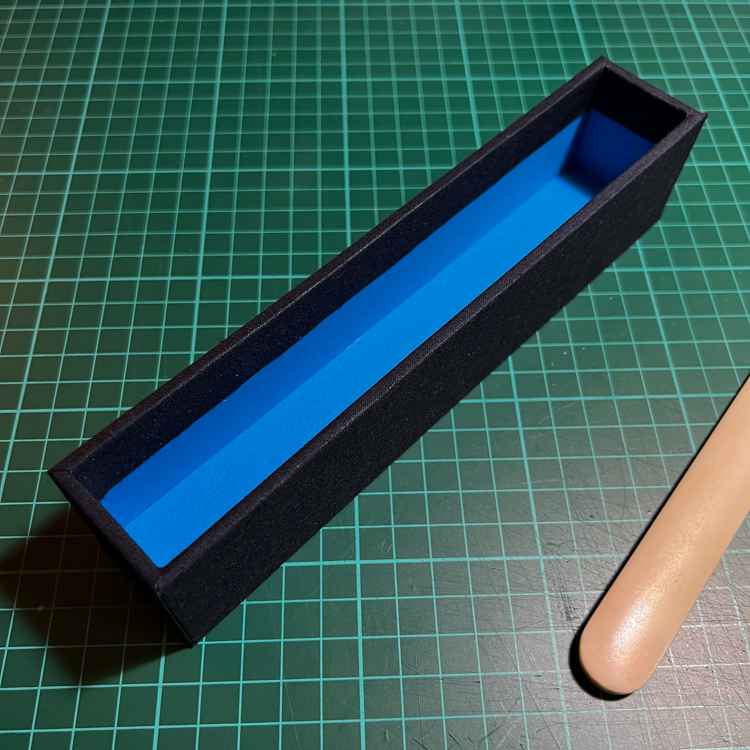
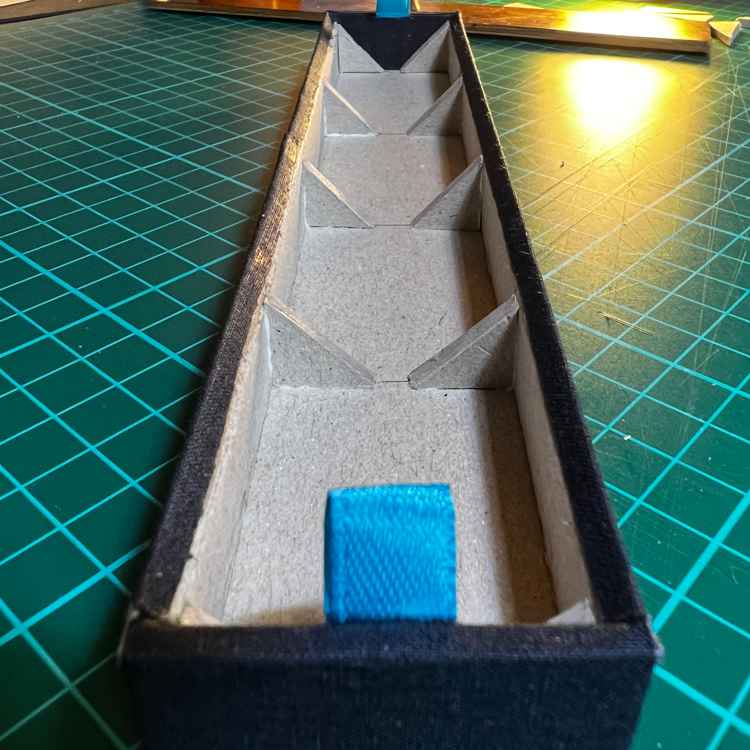
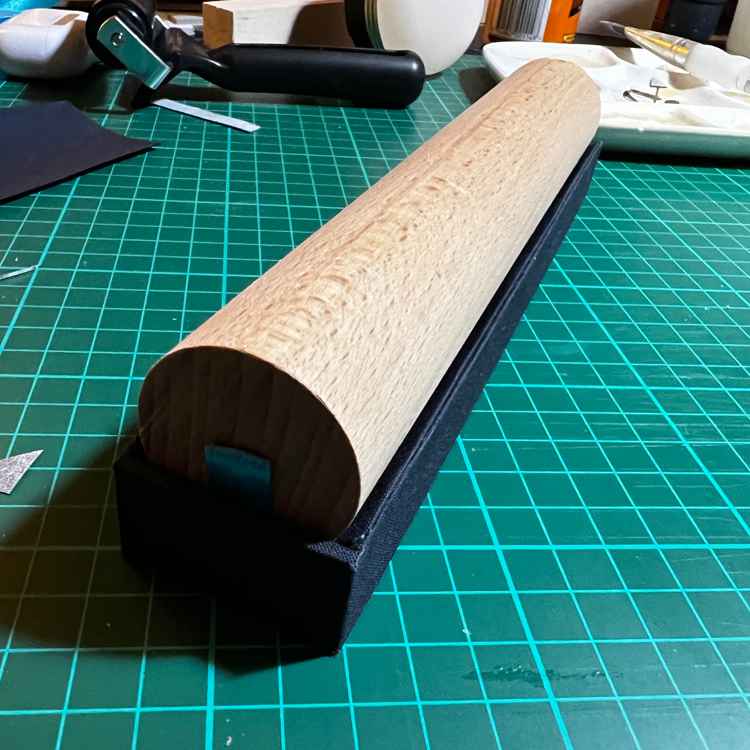
For the top tier I wanted a rounded inside to the box to make it easier to get pens out. That was a bit of a project but I’m pretty pleased with the result. The supporting box is made the same as the bottom tier but without an inside lining. There are supports inside to support the curved bit which is made of thinner greyboard lined with bookbinding fabric and bent around a dowel, then glued to the supports. I attached a couple of ribbon pulls so the pen tray can be lifted out to get to the bottom tier.
I ordered a new inkwell online. It’s not perfect, I really want one with a screw top lid to protect against leaks but this is good for now, you can see it in place in the pics above. I got a coin holder for the penny and that sits under the inkwell now.
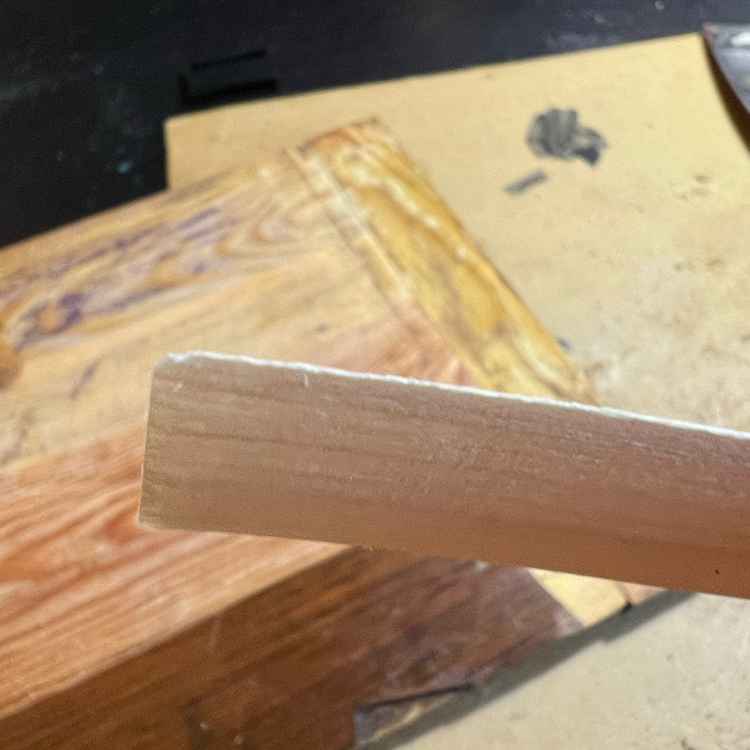
I straightened off the broken original bit of wood that forms the long side of this part and attached a new piece to make up for the height loss. I cleaned it all up, tidied, sanded and reinstalled the blocks of wood holding everything up and fitted it all back together. I’d measured where the strip of wood holding the writing surface was to go and reattached that, I was nervous that I’d not measured properly but thankfully I had and it was fine.
A flat surface
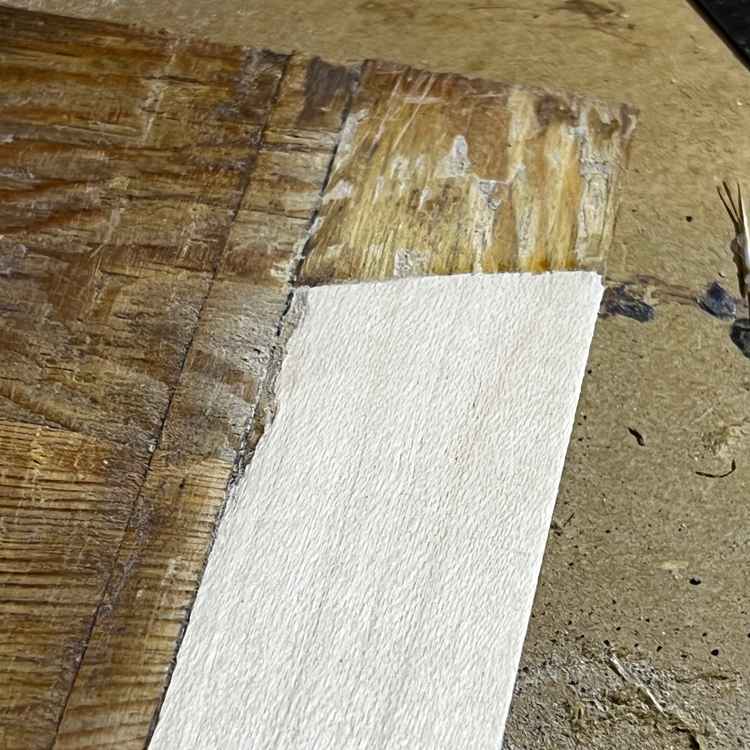
The writing boards themselves were in a right state. I’d removed all the glue but that also removed the layers of varnish hiding some dodgy repairs. Bits of veneer were missing and had been filled in with wood filler.
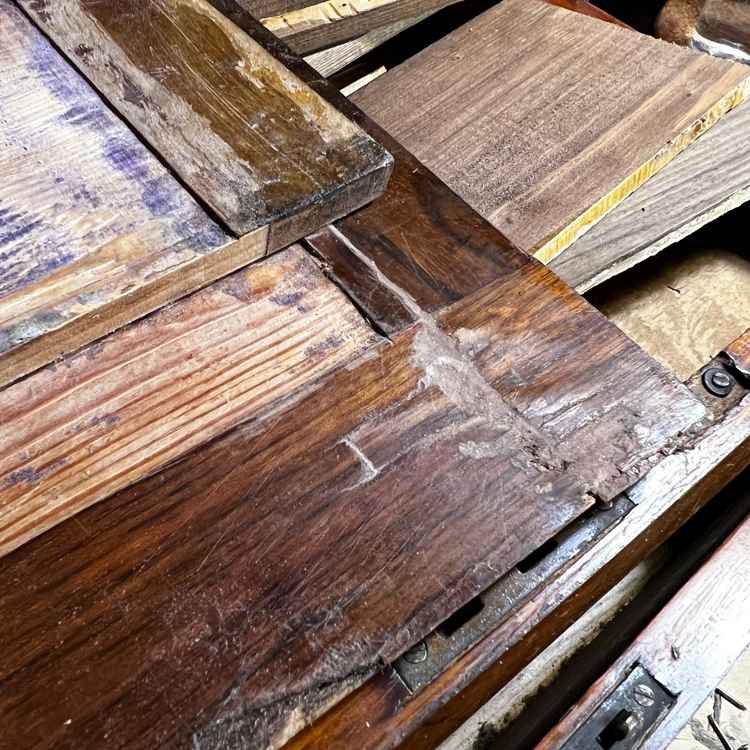
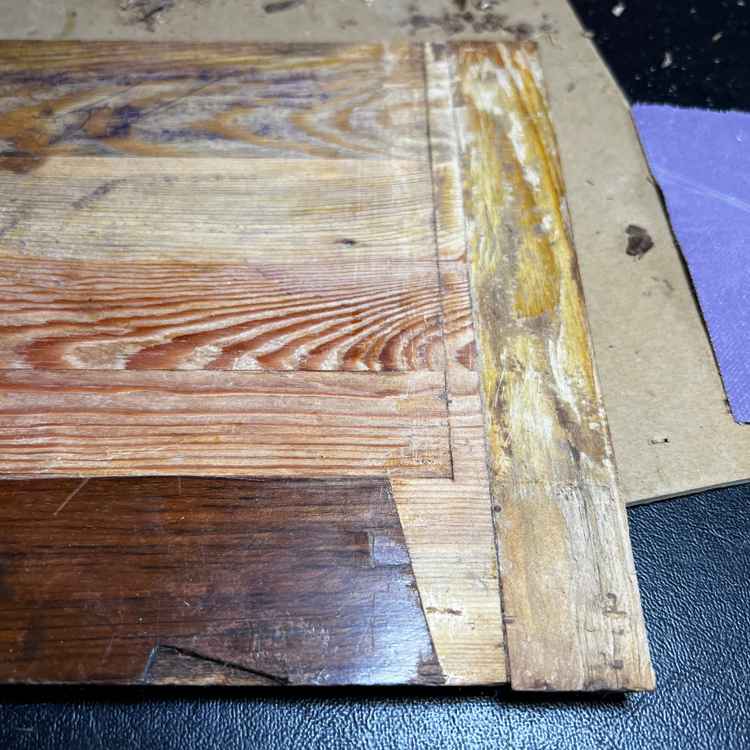
The initial state and the process of me cleaning it up and removing damaged veneer and the messy wood filler
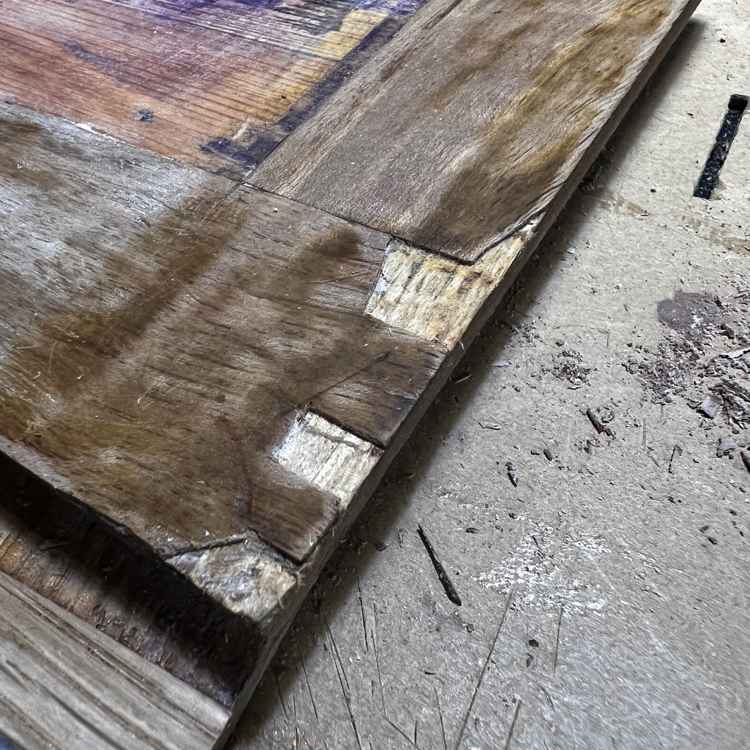
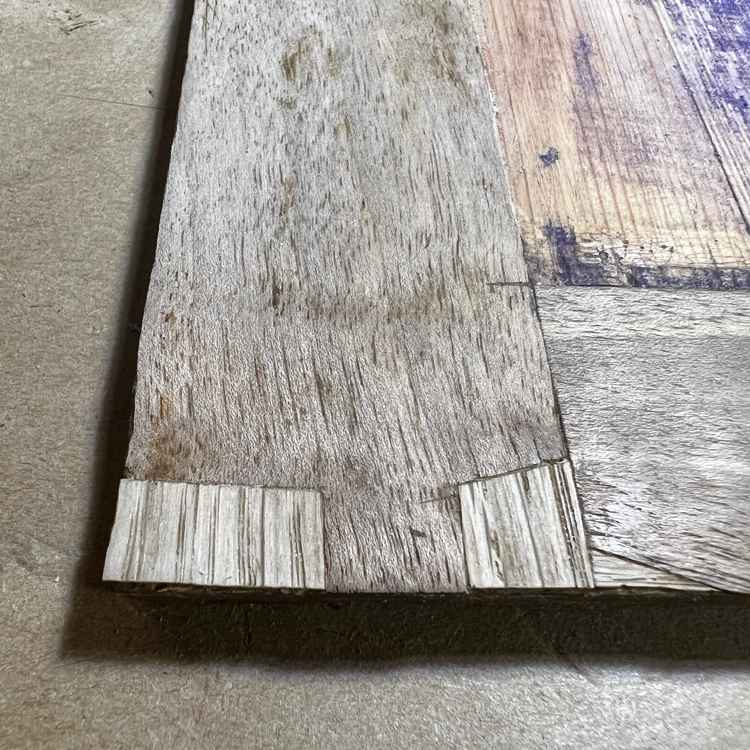
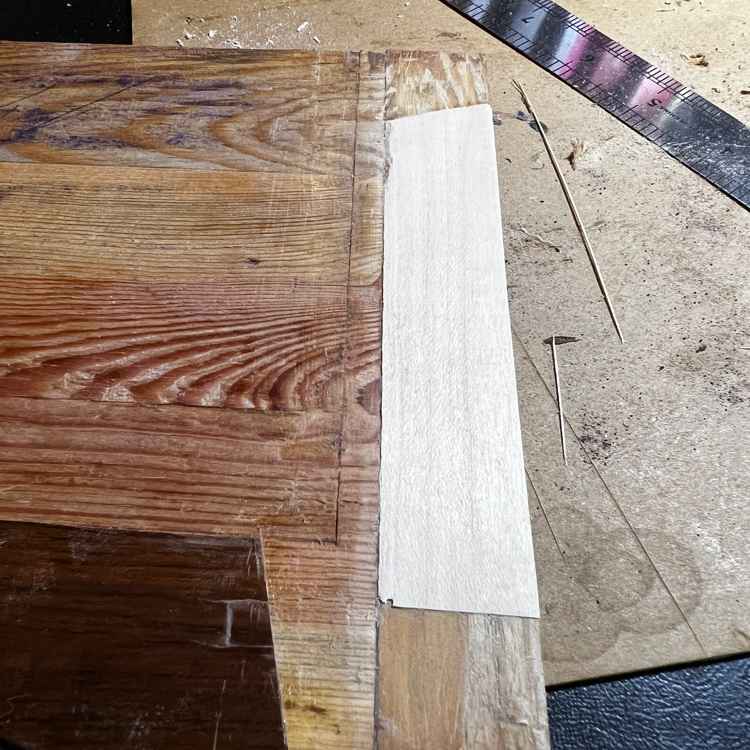
I found some reasonably close matches for the old veneer and cut some new pieces to fill the gaps. I didn’t want to hide that it’d been repaired (I don’t think I could have done anyway) but I wanted it to look consistent and feel nice, and I used some stain to match the colour. I think I managed that. I really enjoyed this bit.
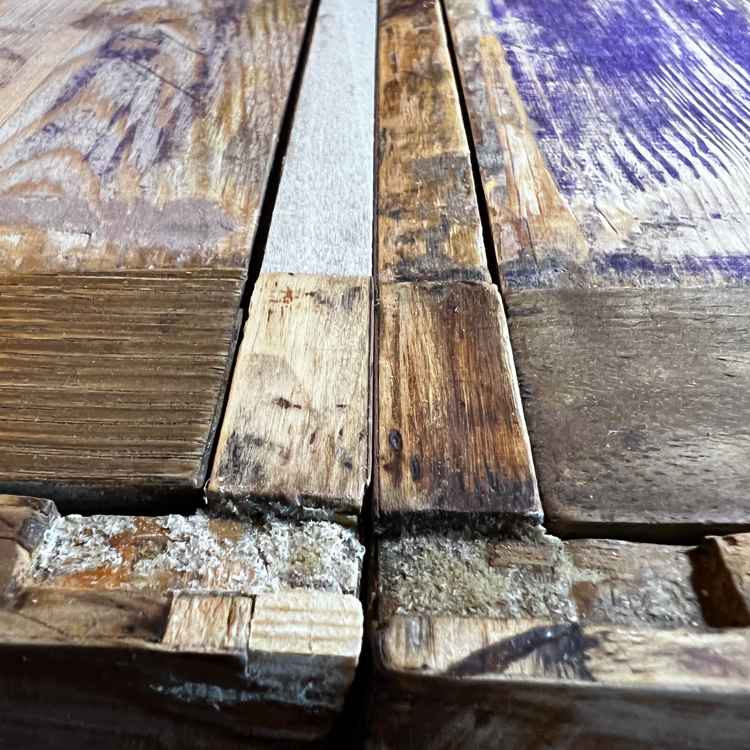
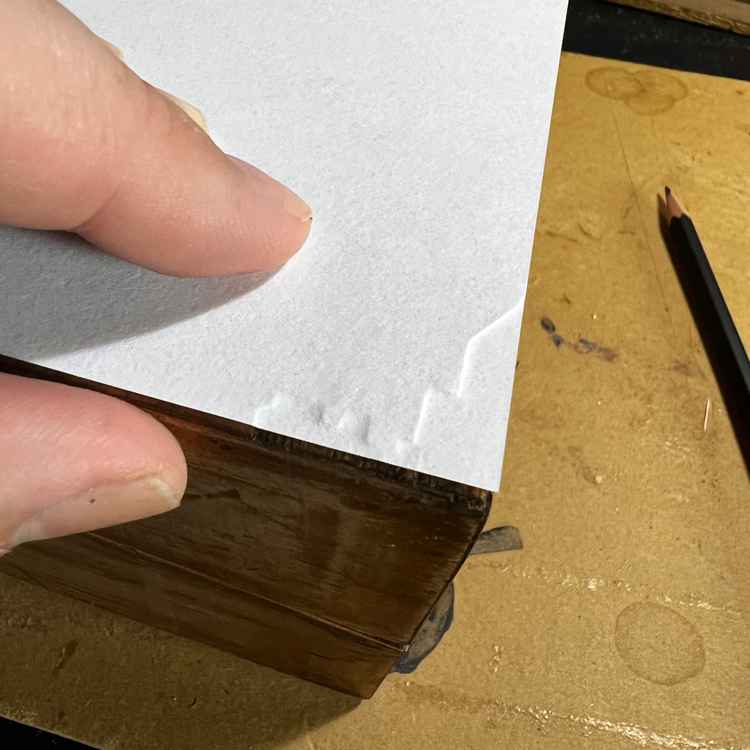
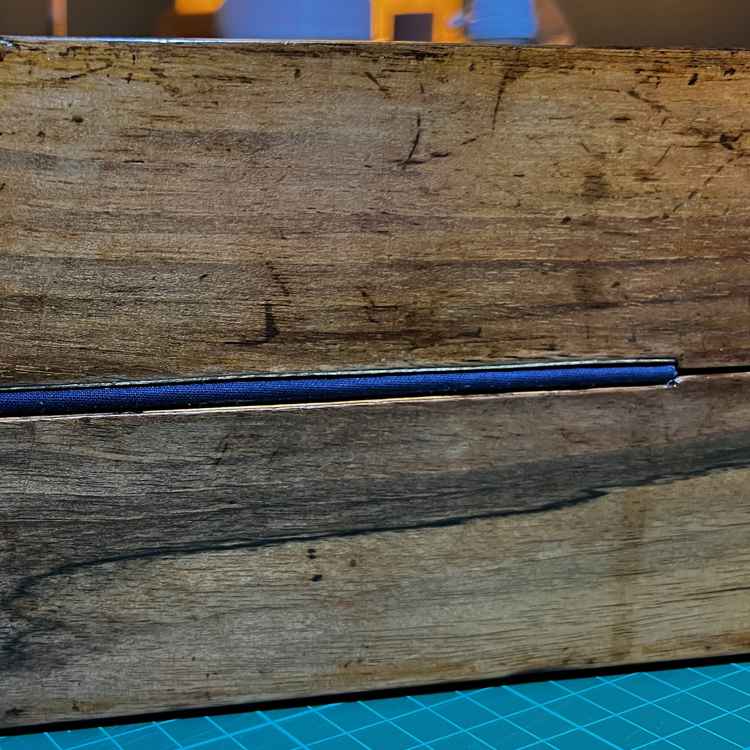
The fabric for the writing surface runs across both sides of the box when open, and the fabric must not sit higher than the wooden sides of the box or it will prevent the box from closing. That means that where the fabric goes must be cut out slightly. The cut out areas on the writing boards were uneven and rough to start with. As well as some sanding I did need to use some wood filler in one bit, but here and for most gaps elsewhere in the box I used a bit of veneer. It felt more satisfying that way.
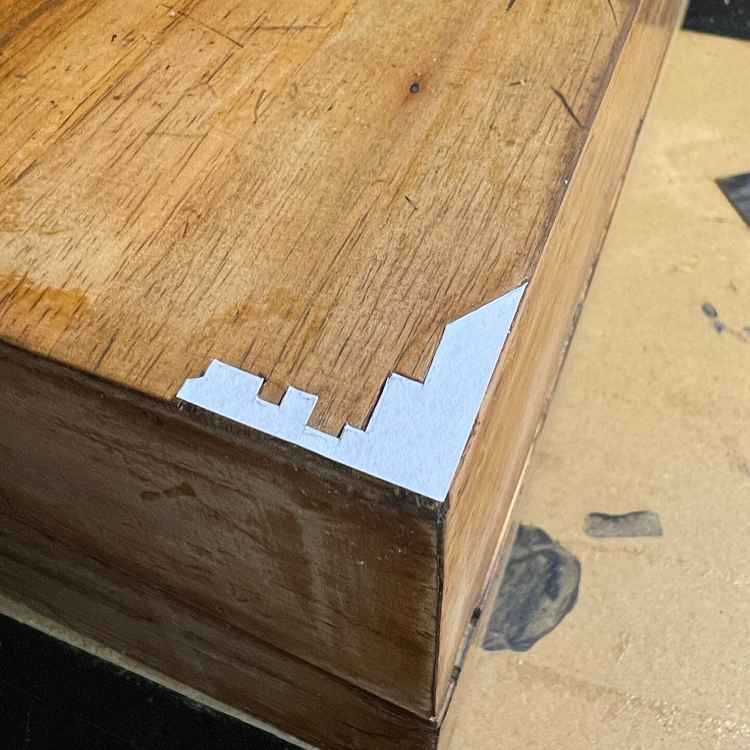
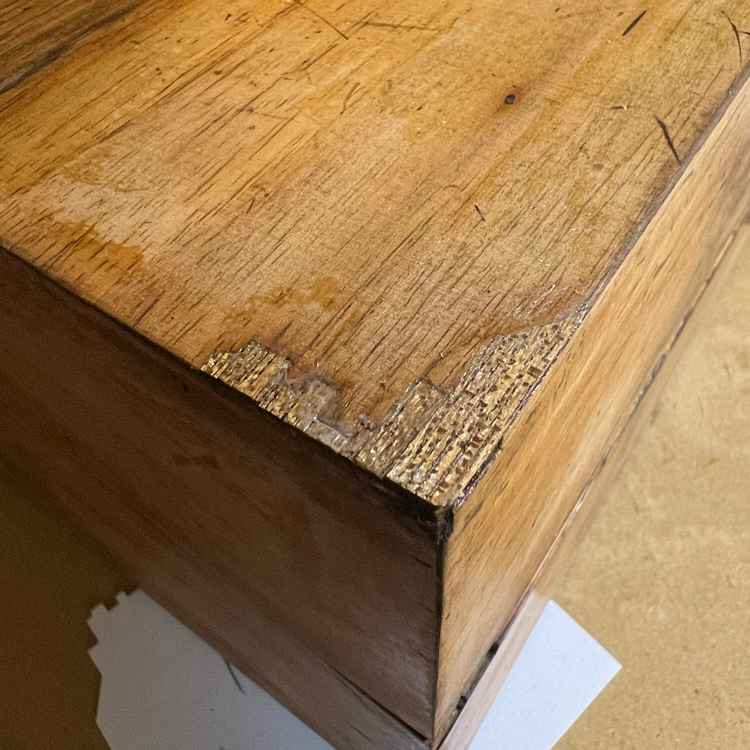
The hinges again
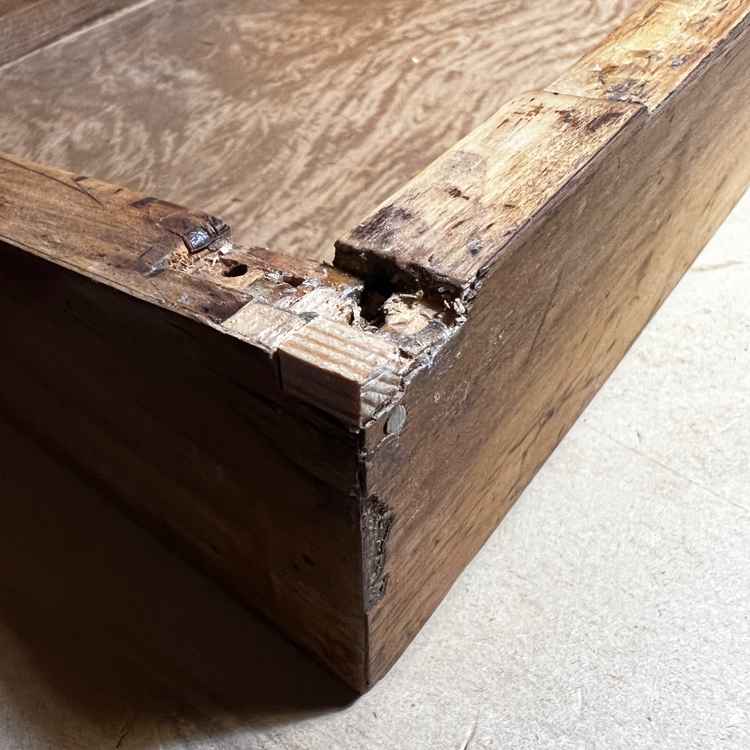
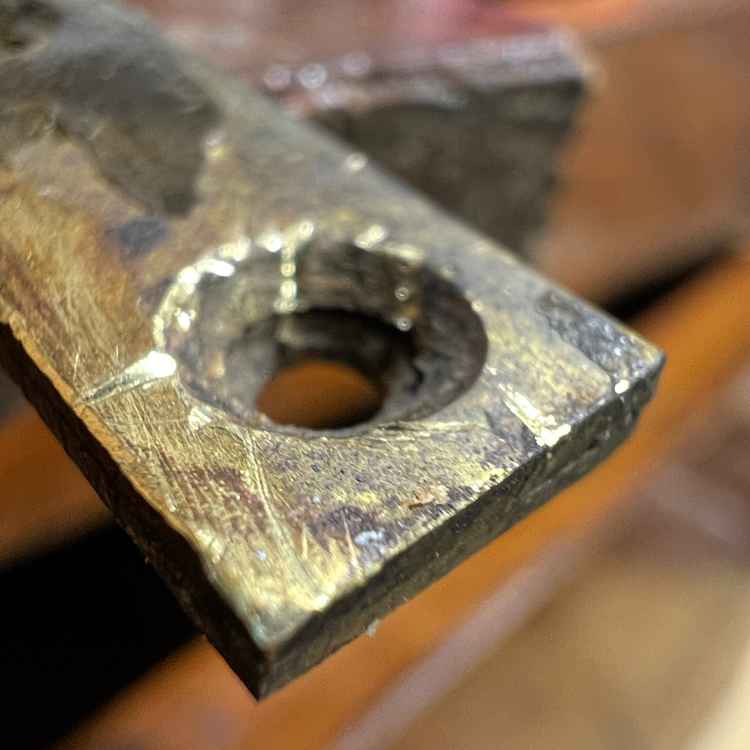
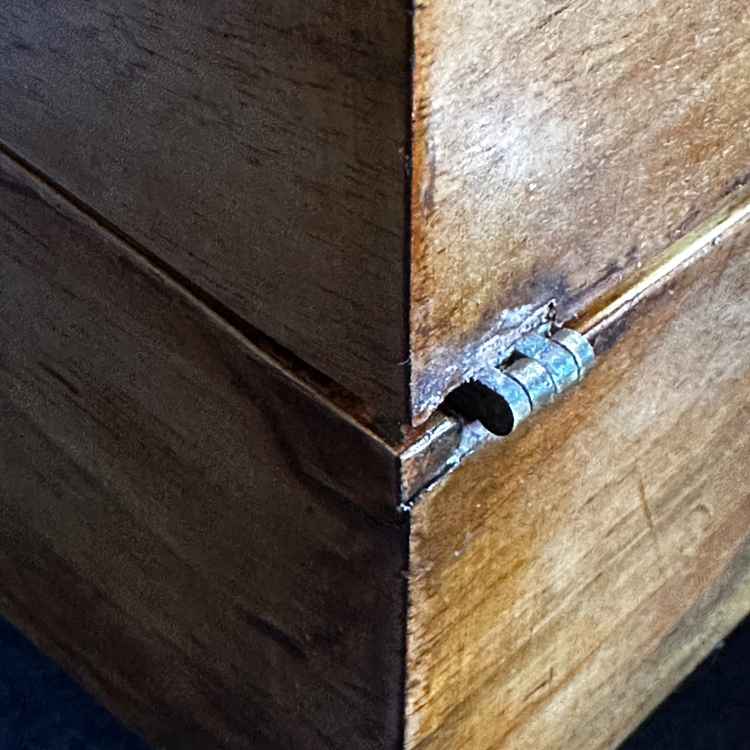
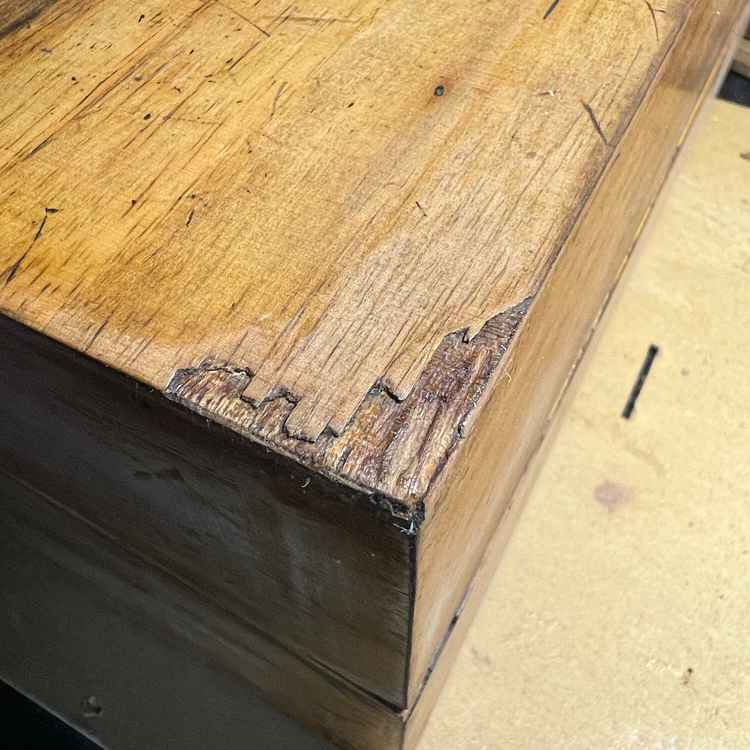
Part of the reason the hinges had got bent was some damage to the corner of the box. The wood filler fiend had struck again here and a whole chunk where the hinge was nailed in was actually made of wood filler. I carefully scraped this out and cut a small piece of wood to fill the gap, I used a flat-topped nail to make it secure which is visible as a repair while looking OK. I ended up needing to cut out where one of the nails had chewed up the wood and insert a new piece. Fiddly work, but it feels robust now.
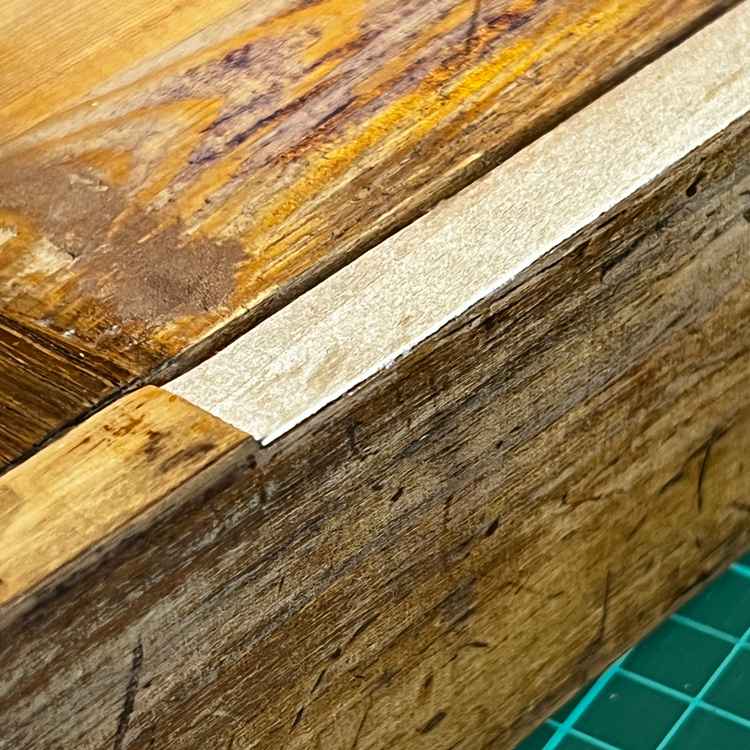
I put the two sides of the box together to check everything was even and that reminded me of the wonky writing surface at the start. The edges of the box need exactly the same depth of cutout as the boards for the writing surface, and one of them was very different. Another fix with another bit of veneer.
I used screws, real actual screws, to reattach the hinges. It felt more secure and less risky with all the repairs to the wood I’d done. Once they were in it was a moment of truth and hurrah! They worked! It certainly doesn't look new and perfect, but that's fine because it isn't.
Bish bash bosh
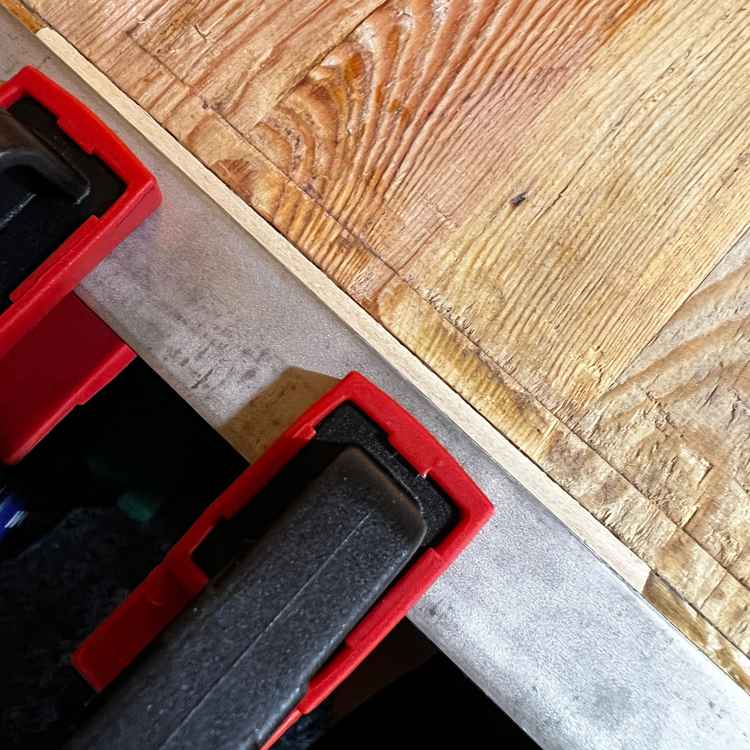
The outside of the box needed some missing bits of veneer repairing. Like with the writing boards I wanted it to be obvious this was a repair, but not in-your-face obvious, and I did have a much closer match for the grain of the wood but I preferred this other one. This was again a very satisfying thing to do. That feeling when a piece of veneer you’ve cut just fits and looks right, it’s amazing.
Fingers and thumbs
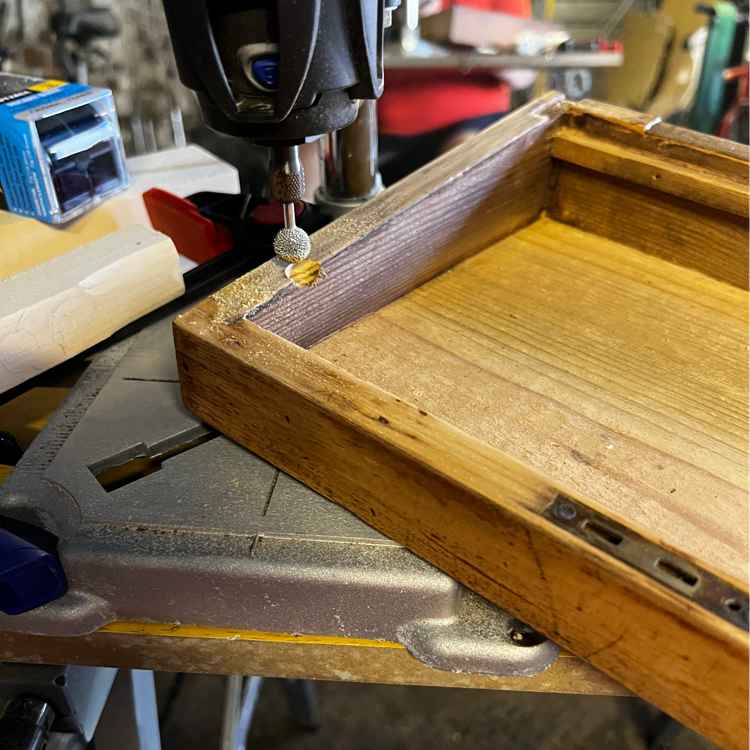
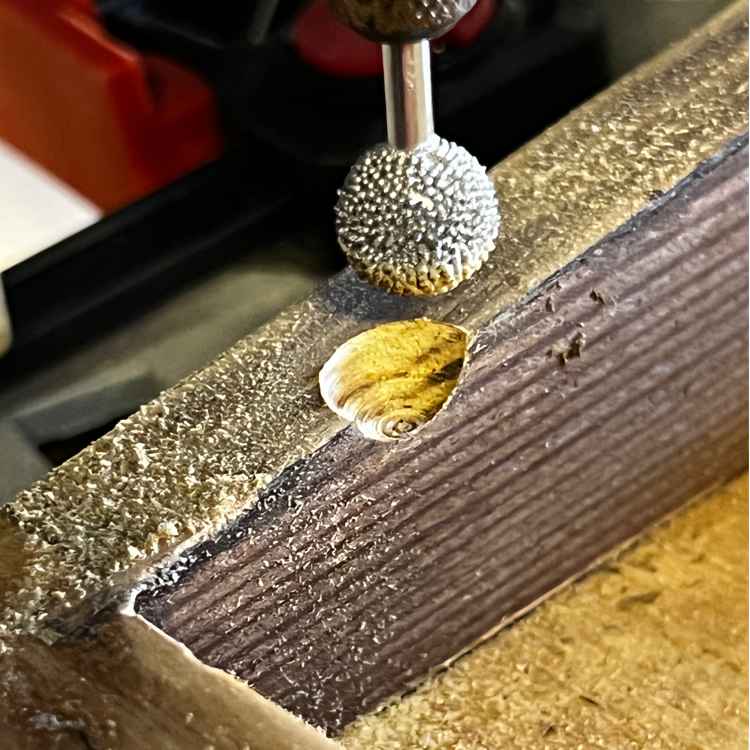
Traditionally in a writing slope you lift the inner lids using a tab of ribbon. I was thinking of doing that, but felt that a bit of ribbon sticking up would just be annoying if you’re trying to write. So I made an actual change to the function of the box and cut finger pull holes to the side of the lids. It makes the box easier to use.
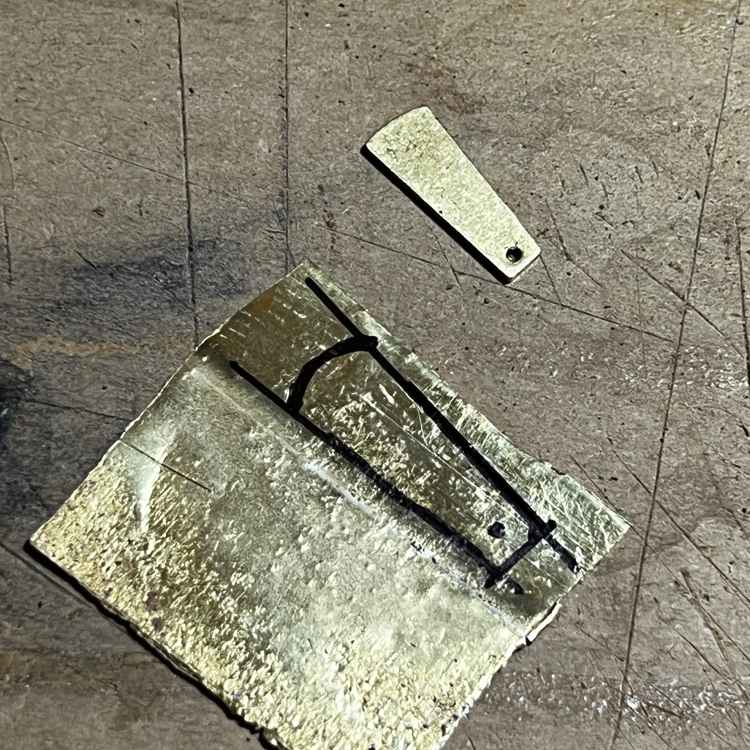
The box had originally had a catch on the writing board that is on the ‘upper’ part of the box when you open it, to stop it flapping open and dropping everything out. I looked online for anything that might work, but the usual thing with the internet is there is one wrong answer to anything to do with certain words and there’s no way to escape it. I ended up making a catch with a piece of brass I had. I had to do this twice because the first attempt was the wrong shape. Satisfying in the end though.
Varnish
I varnished the box. If I was being authentic and traditional I'd have waxed and oiled it, but I didn't want to.
A cosy lining
Before attaching the writing boards again I wanted to have a nice new inner lining. I’d used bookbinding fabric for the pen tray and to cushion the underside of the boards themselves and I considered it here, but felt fabric seemed like a better option. It would cushion any contents when you move the box and reduce rattling. I also had the most pinkest of pink felts to use and since I was planning to use navy blue for the other fabric bits I liked that the inside would be a bright contrast.
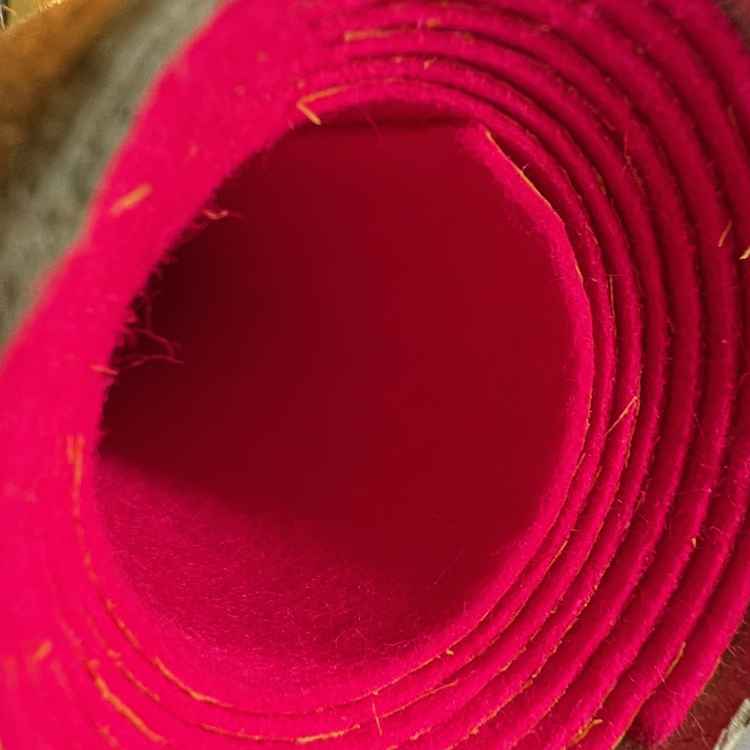
I love how the camera just can’t handle how pink this is. It’s amazing.
Beautiful colour, but very difficult to install. It’s self adhesive and very flexible and stretchy so just grabs onto the wrong bit and threatens to tear. I did not enjoy this one tiny bit. I was glad when it was done and that somehow I managed to do it neatly. You know those moments when you do something and you feel you deserve some kind of applause? That.
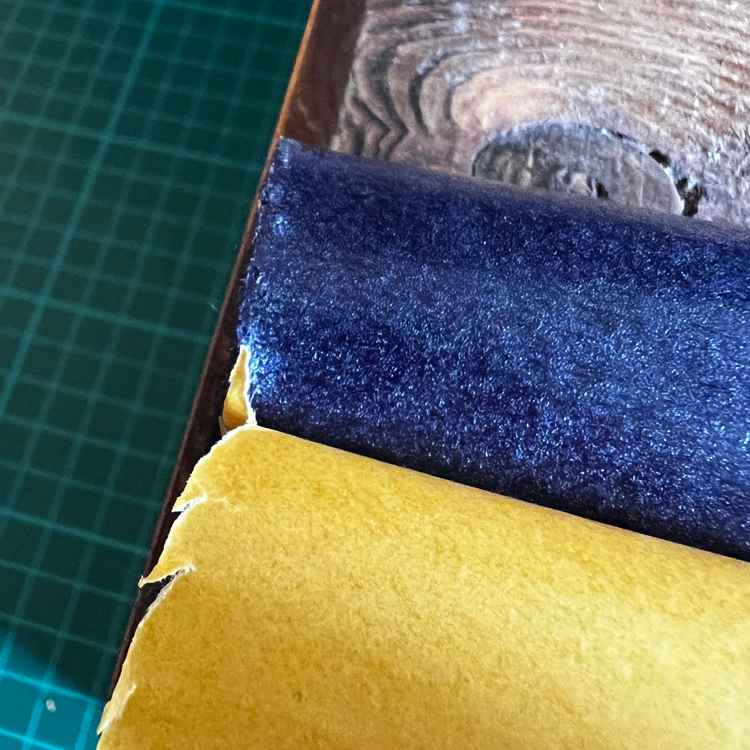
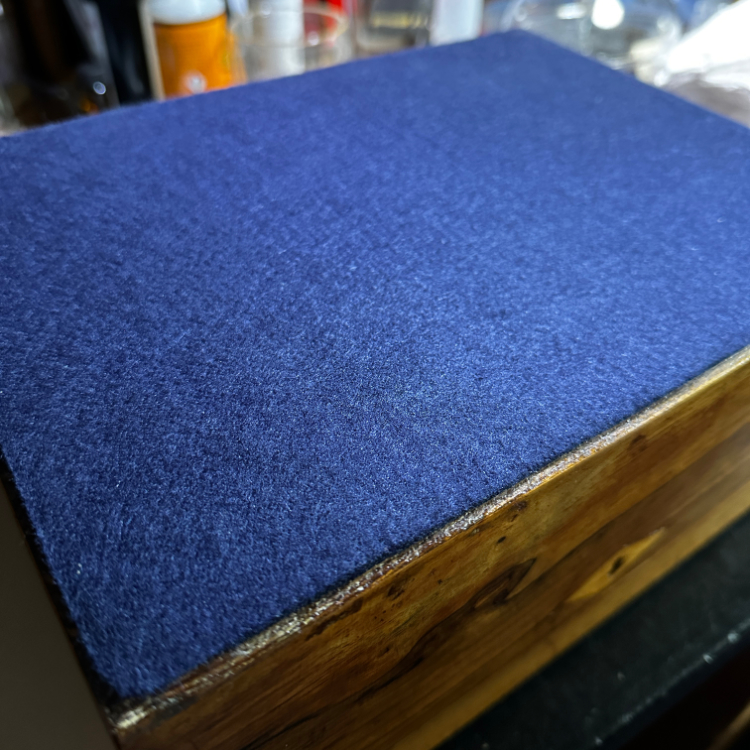
Board meeting
Another tricky moment was attaching the fake leather writing surface. I do eventually want to restore my actual desk and replace the writing surface there, so I consider this practice. I had reattached the rails to support the boards so I put the boards in, used a few paper shims to make sure they didn’t shift (there is a couple of millimetres of gap around them). I glued a piece of bookbinding fabric across all three hinges (one for each board, one for the box) to reinforce them. I’ve seen people use gauze or interlining fabric here, but that’s usually white and I didn’t want that to be visible when the boards are open or the whole box is closed.
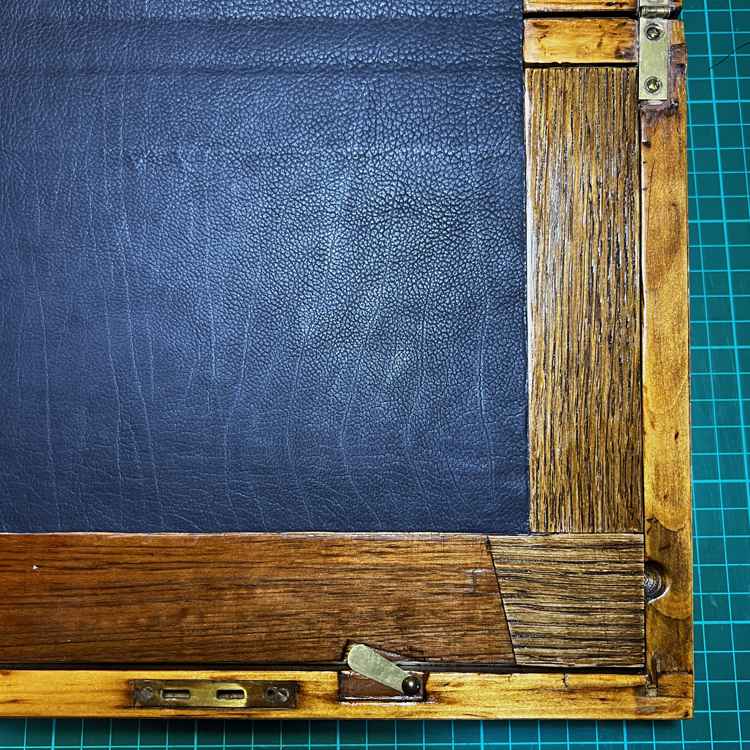
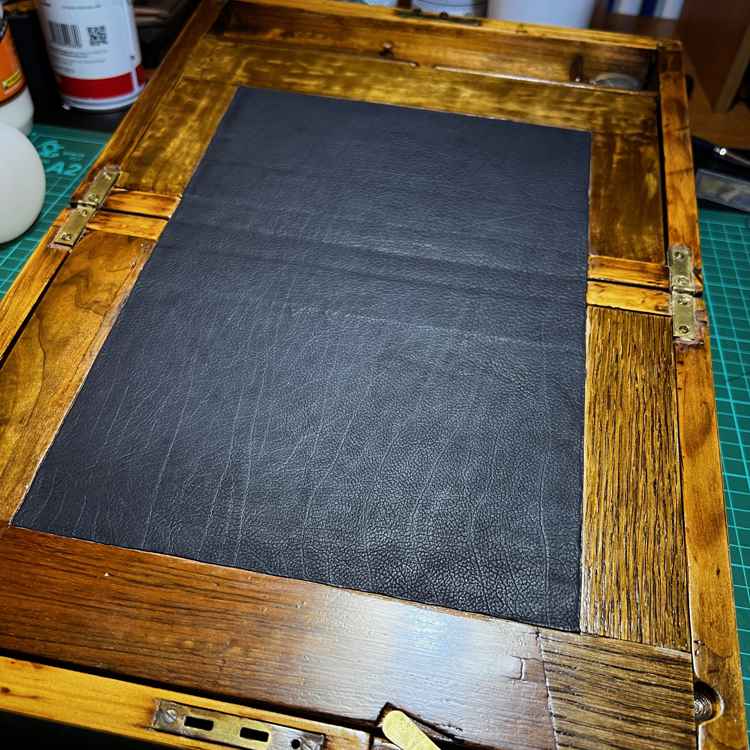
Once that was set I put down the fake leather. That wasn’t as difficult to cut as I thought but it was still a bit stressy. The trick is to do a corner and the two edges next to it, then trim the other edges. It worked nicely.
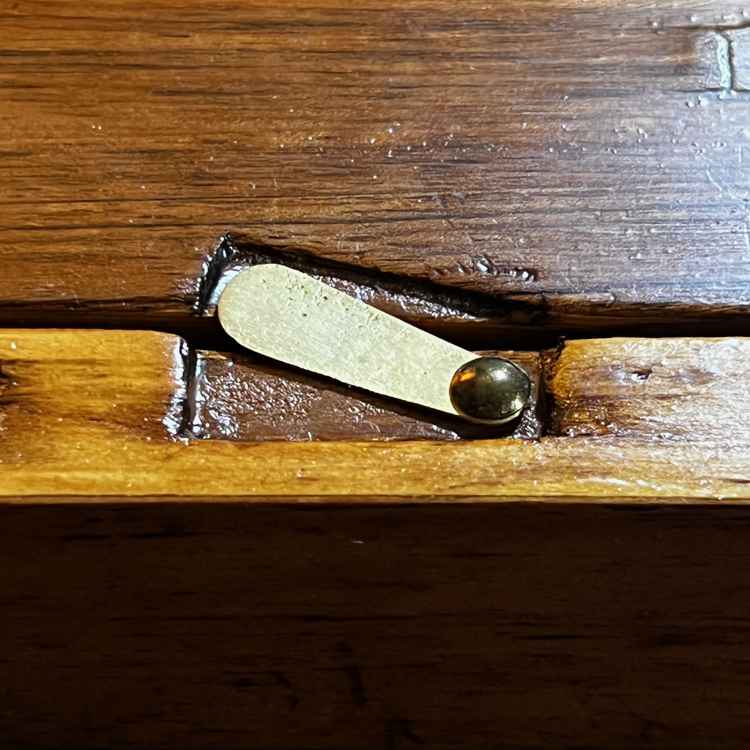
I then attached the catch I’d made using a nice dome head nail and a punch. It looks right which I’m very pleased by.
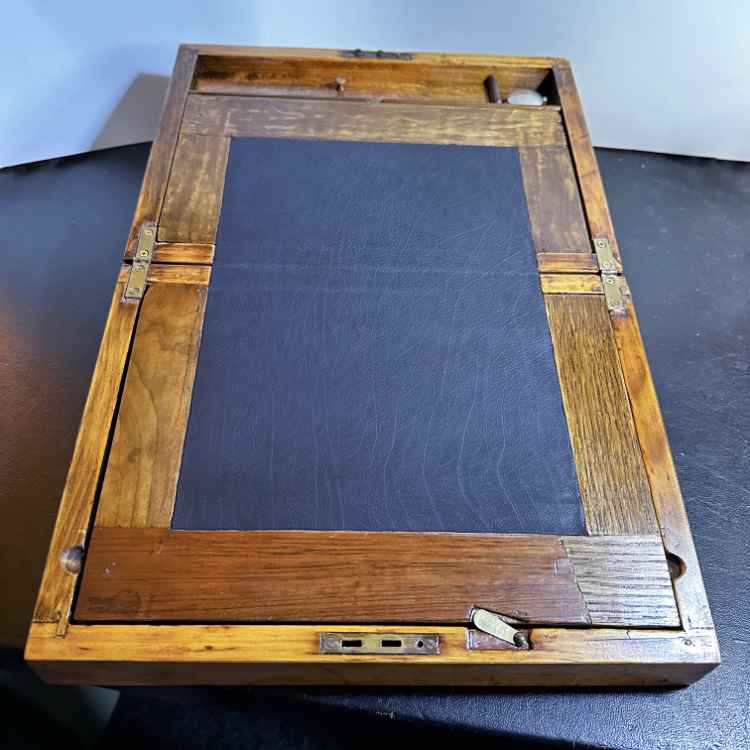
Bottoms up
The last thing to do was to attach the felt to the underside of the box. Since it was just a flat piece this time it was a bit easier. It all looks neat and tidy now.
And, done
So there it is, a writing slope box! It took a while for the glue to set properly on the writing surface, I left the box closed for a while to apply pressure to it, but when I lifted the writing boards the stiffness of the reinforcement caused a bit of it to separate. Easy to fix but perhaps I could have done some ‘pre-flexing’ beforehand.
The outside of the box looks largely as it did before, just with the cracks and chips fixed and no bashed-up corner. The lock engages nicely now and it all feels more solid and robust.
I’m very pleased with how it turned out. It was a messy, filthy job (removing the old felt and velvet was disgusting).
Have I used it as a writing box? Well… no. The idea is there though.