
Attempting Intaglio
I have wanted to try intaglio printing for a long time, since writing about guilloché patterns for my old blog. Because it was how banknotes and certificates were printed it seemed a bit special to me, and I wanted to try it for myself. Now years later I get to have a go. I've made a bit of progress, there's still a lot to learn but I wanted to write down where I'd got to so far.
I'd researched what I needed, and what I could make using what I already had. So, I got a Fome etching press, some brass sheet, a bottle of ferric chloride and citric acid for etching, and already had a laser cutter, paint and other bits I needed.
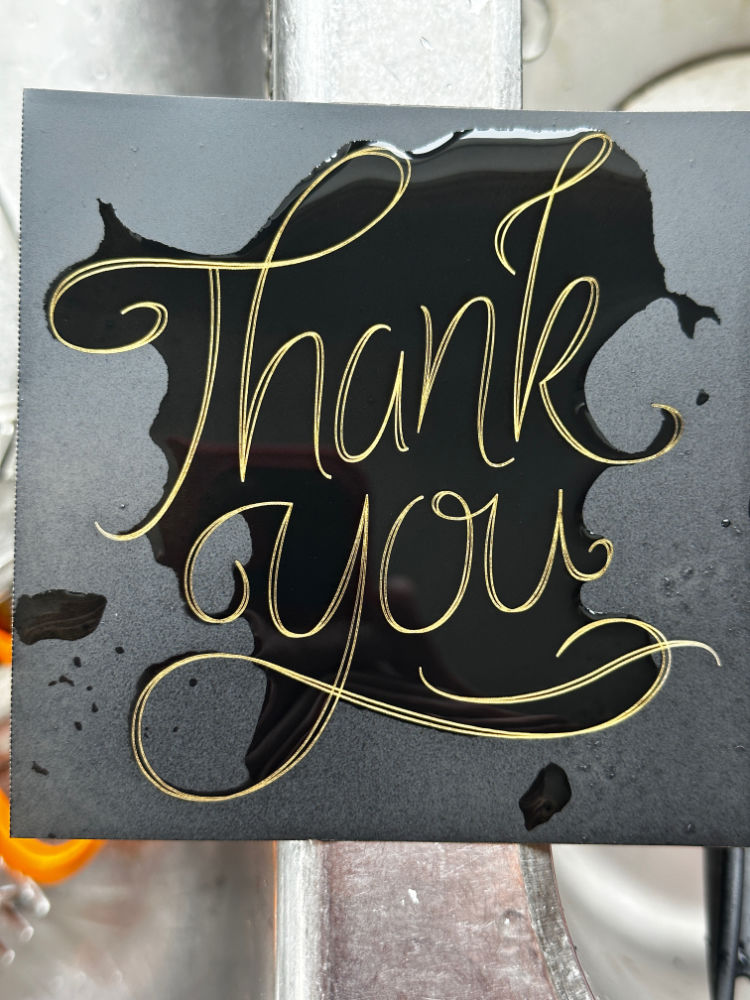
I made a test image first. It's intaglio printing so I wanted something sort of certificate-ish. I spray painted the brass sheet using black acrylic paint, and used the laser cutter to burn the image into the paint. I then wash the burned paint off and it leaves the brass exposed where I want the image to be, with the rest still covered in paint. Then, into the mix of acids (this mix is called Edinburgh Etch, and saves time and makes a cleaner image). Then, after a while (45 minutes roughly) I clean off the acid, then remove the paint with acetone. The areas that weren't protected by the paint have been eaten away by the acid and will then be good to hold ink for the printing.
My first attempt actually went pretty well. So, onto an actual thing. For my birthday my family had kindly sent some money to go towards the press. I thought it would be cool for the first proper thing I print with it to be thank you cards.

I made a couple of printing plates and was all ready to go when I realised, I haven't reversed the image. I decided to etch it anyway to check the process. One thing that came out of it was that the plate itself becomes part of the design. Even if you remove every trace of ink from the edges of the plate it will still leave an indent in the paper. So, I decided to make that more of a deliberate thing.
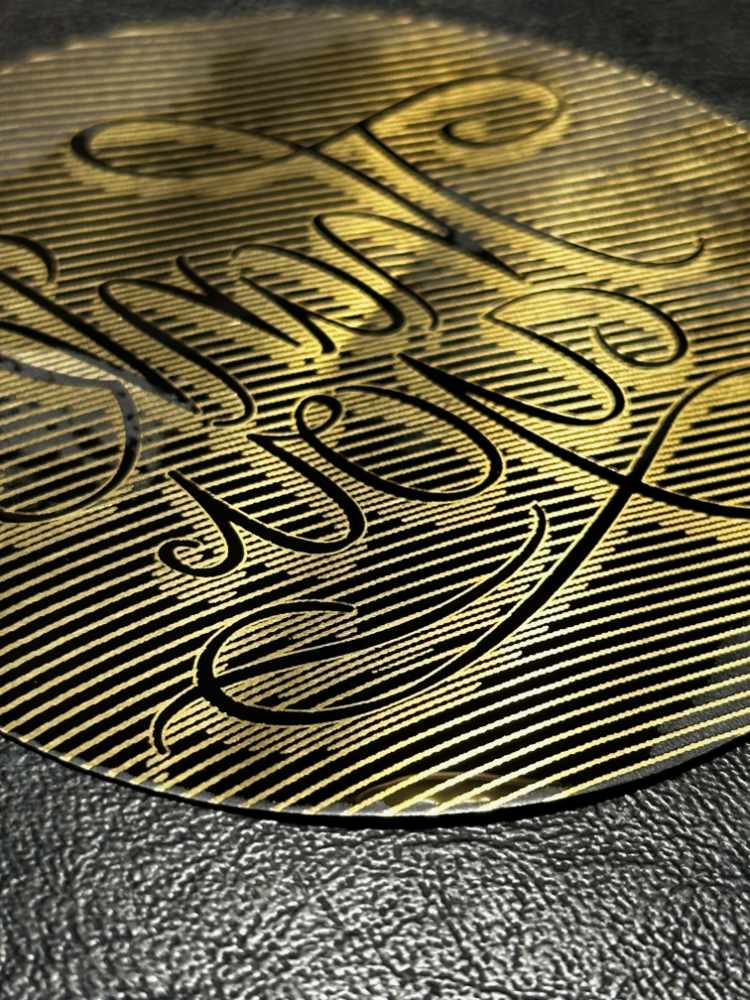
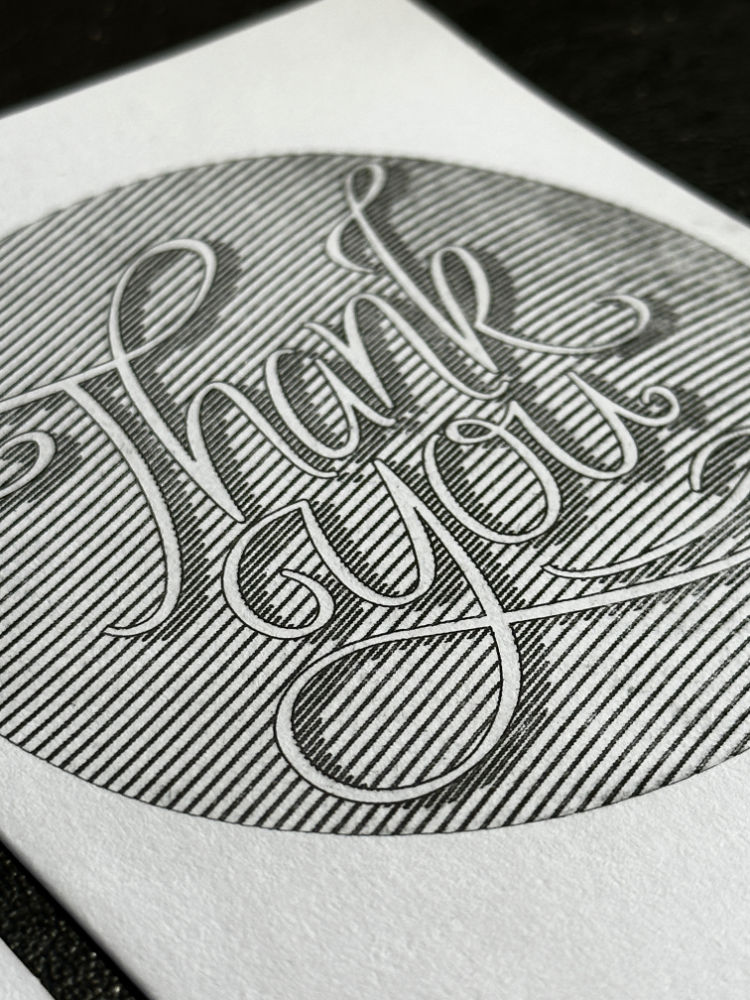
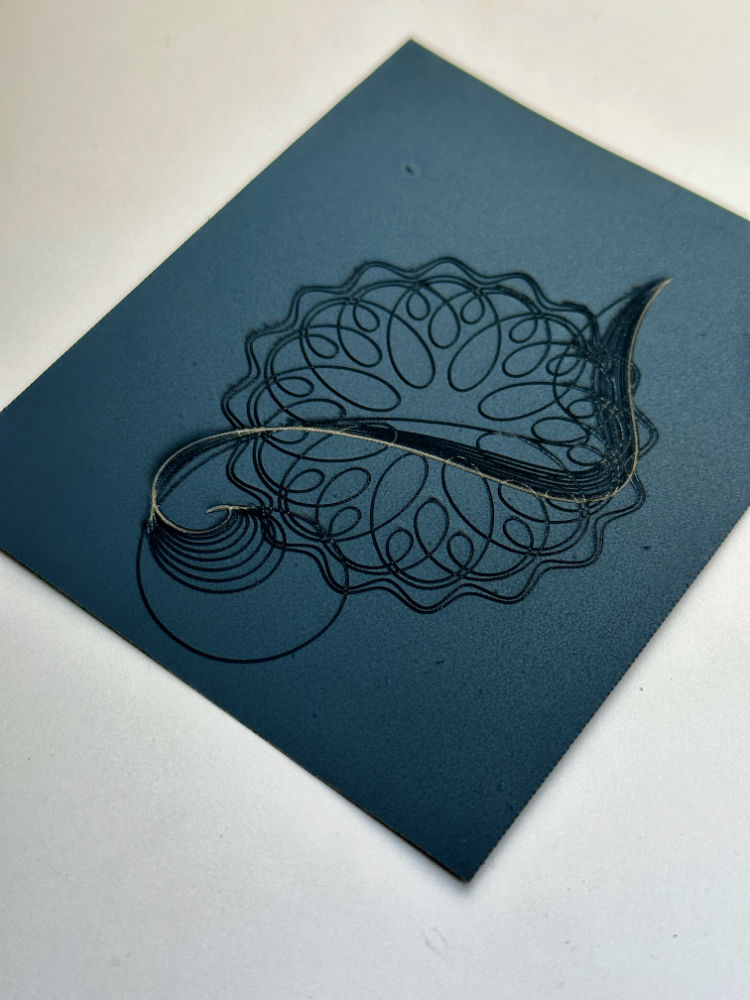
I changed the design to be bounded by a circle, and with a line texture covering the surface of the print. This meant lasering and etching two images in turn. First, I laser cut the circle into the brass, and then left it in the etching solution for 2 hours. Rather than etching a groove in the brass, it cut entirely through the metal leaving a nice neat circle. There are of course other ways to cut a circle out of metal but I am using the tools I have. The second step was to position the circle carefully and then use the laser cutter to burn the design into the remaining paint. Then a second (shorter) stage in the etching solution, and I have a circular plate.
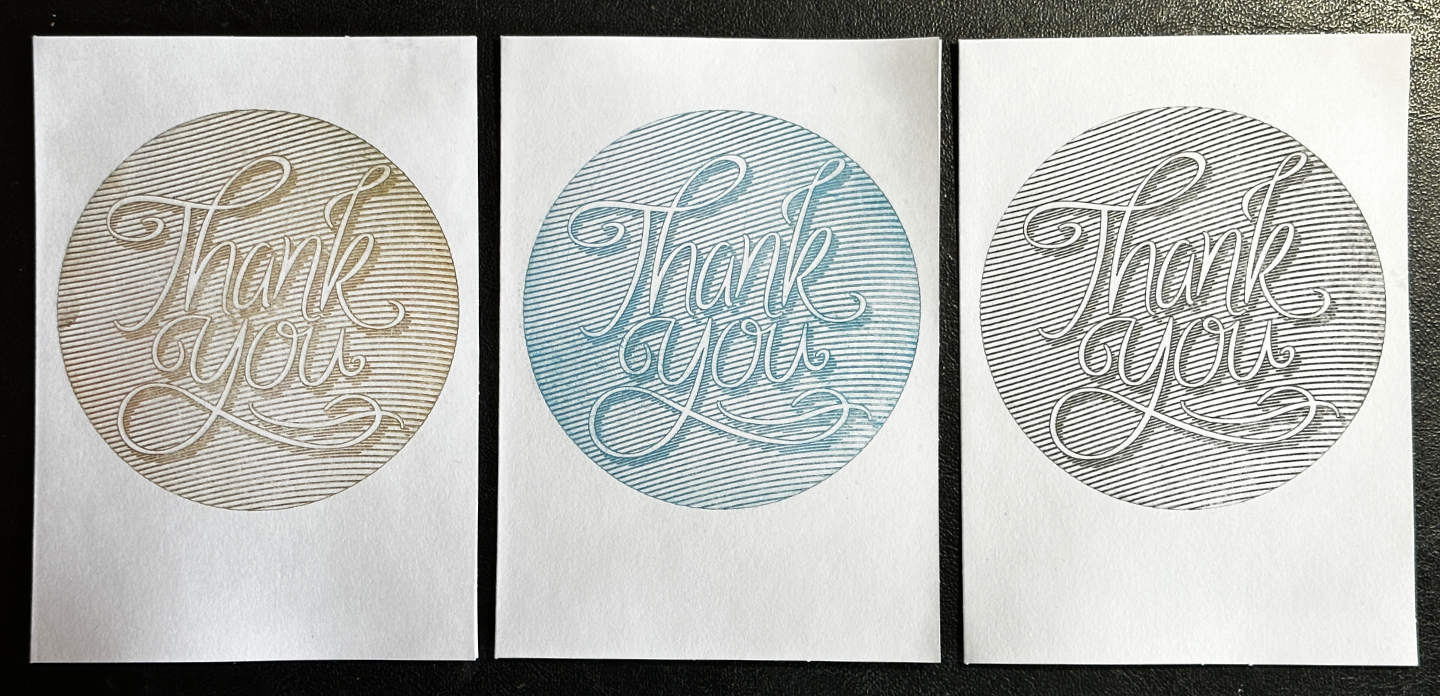
I was pleased with these tests! Notice how the blue is actually blue, of course it is, I used blue ink. That'll come up later.
Since that had worked fairly well, I decided to try two colour printing. That means printing twice on the same sheet of paper. You have one plate for one colour, position that on the press, put on the paper, print the image, then replace the plate with the one for the second colour, place the half-printed paper on top, and print again. So that means putting both plates in exactly the same place as each other, and putting the paper on top in exactly the same place both times.
I thought that would be the difficult bit. No.
The registration turned out to be easy. I used 'gauge pins' which are compressible bits of sticky foam with a thin lip of plastic on top. They stick to the base plate of the printer and let you position the paper the same place each time. For the plate itself I cut out a hole exactly the right size and shape in an acrylic sheet. Simple.
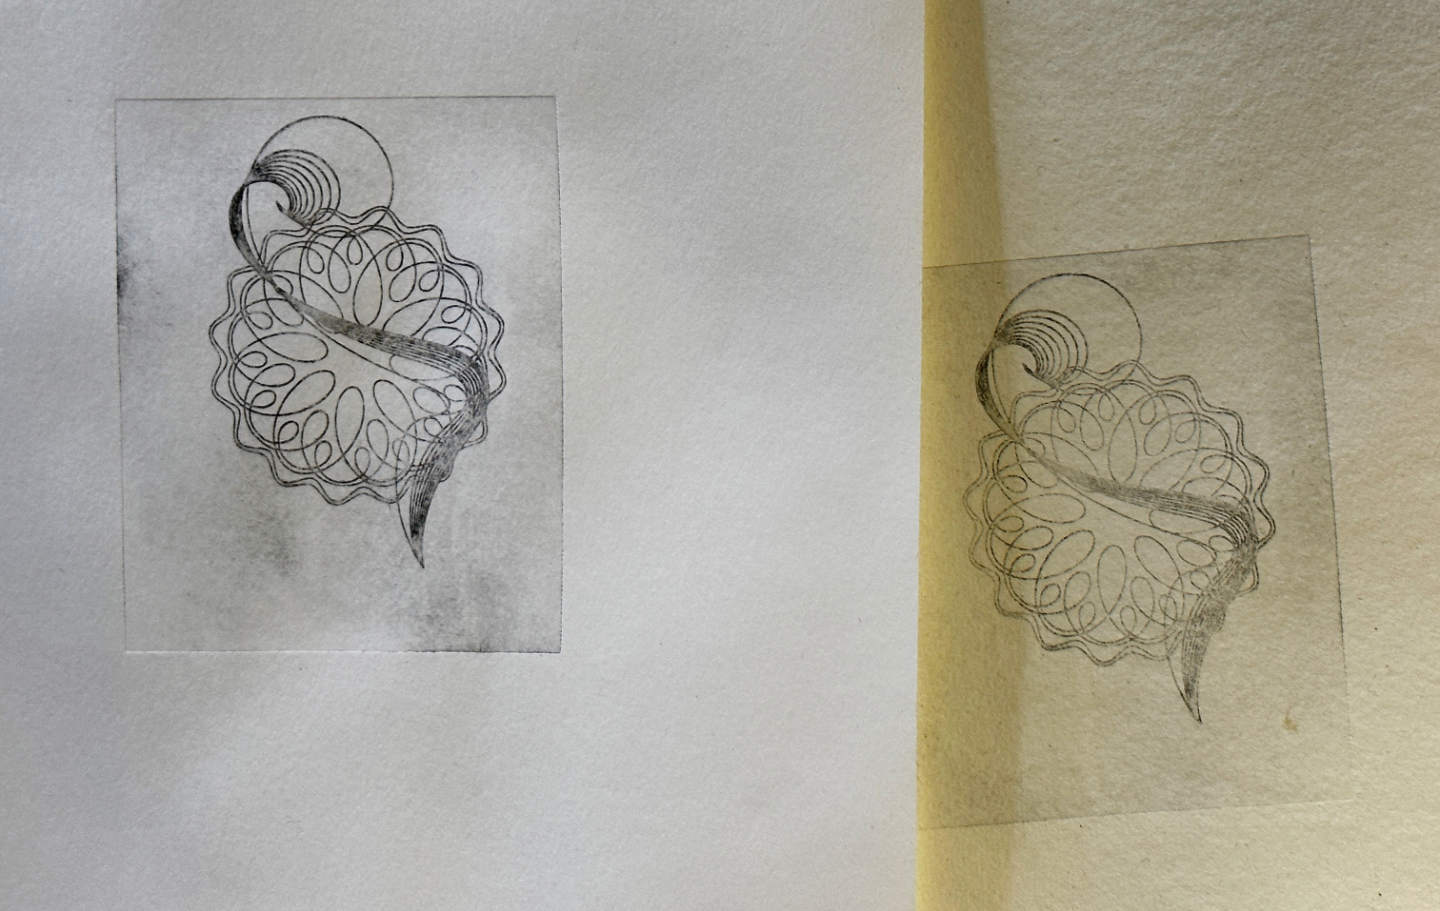
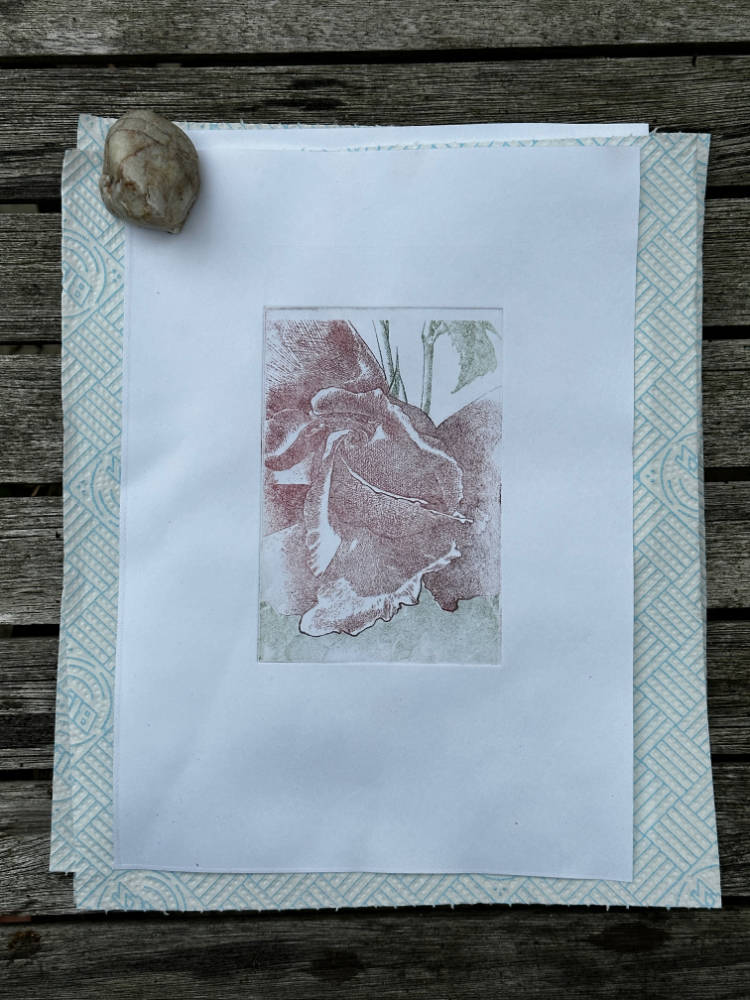
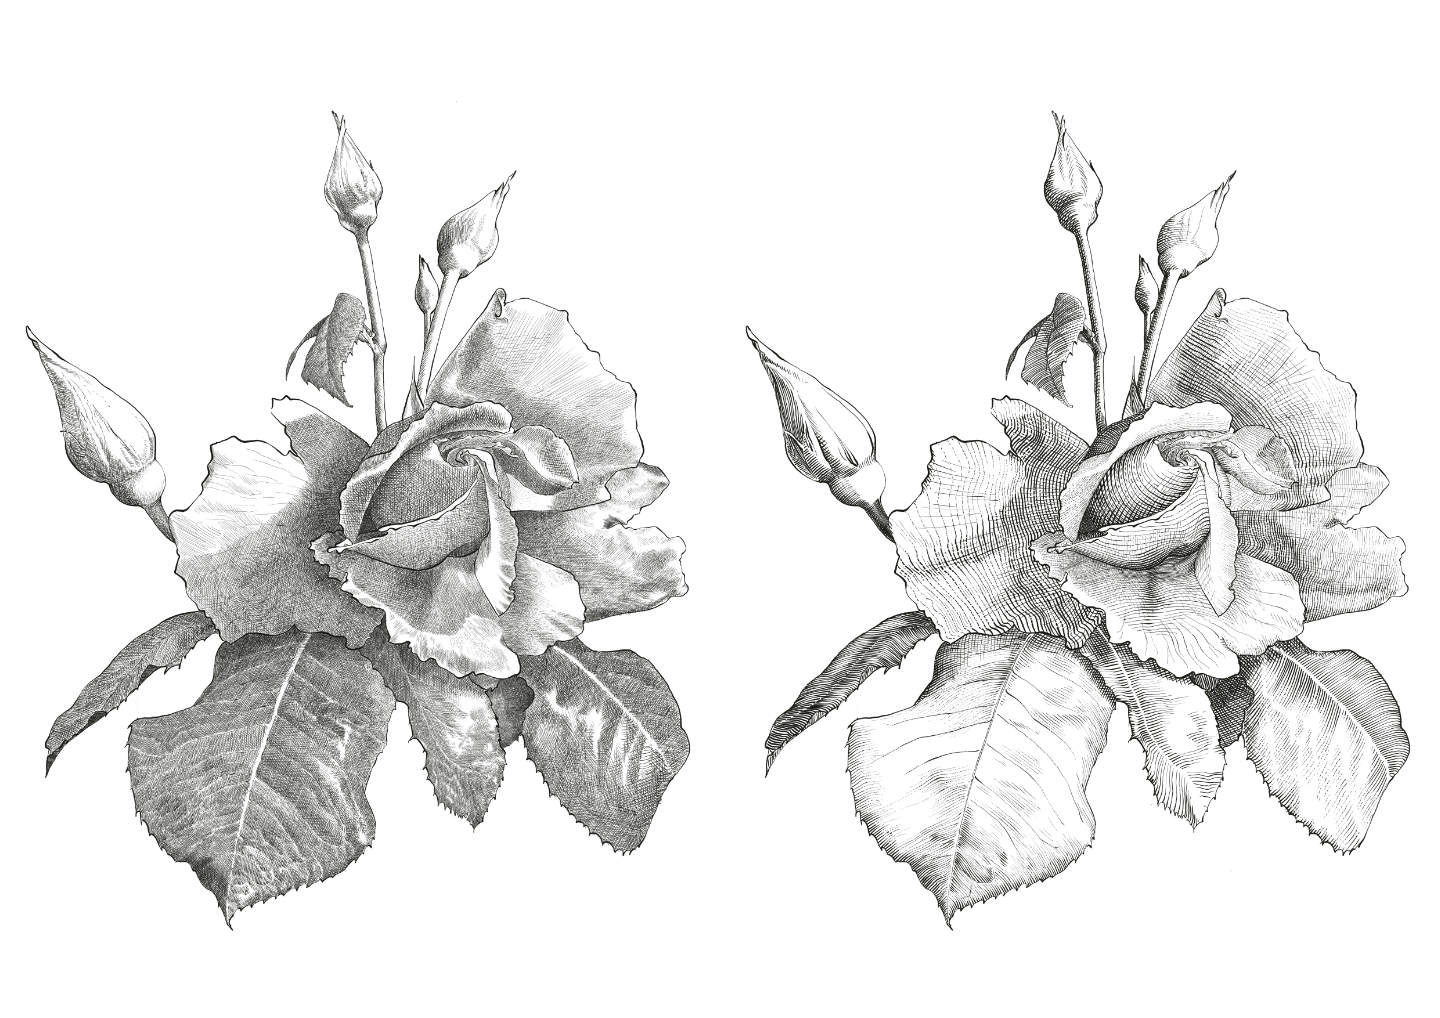
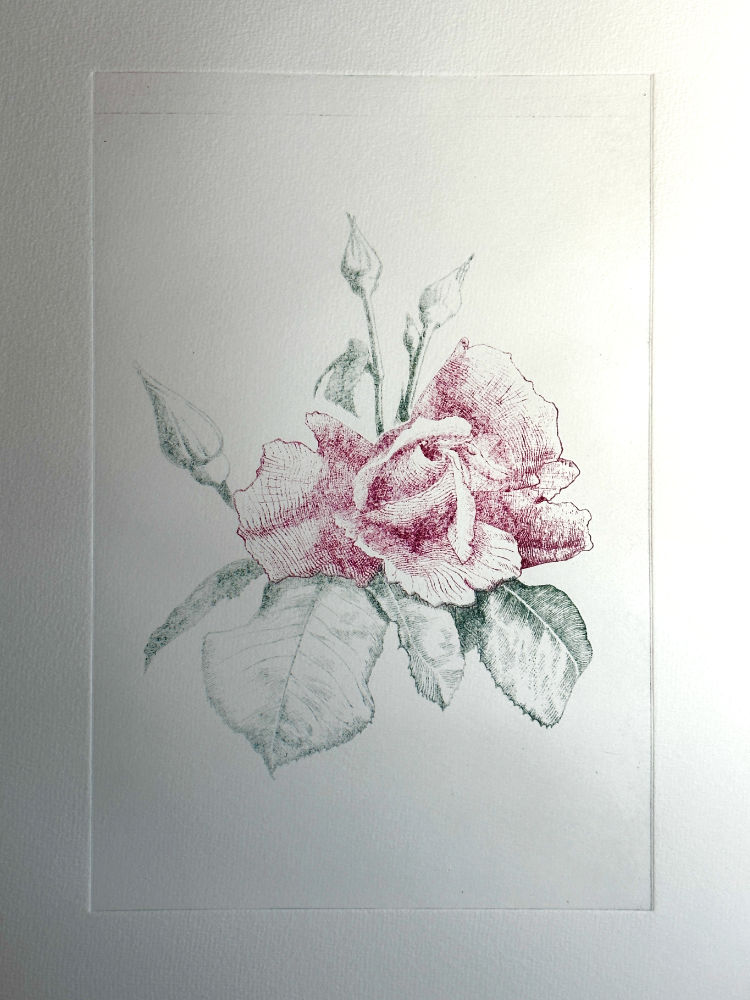
The difficult bit was getting a good print using the paper I had. It was a bit blurry. I figured the issue might be that I'd done a very soft-toned image using lots of cross hatching. You don't see that so much in etching so maybe I needed a different style. So, time to redraw the image I'd spent quite a long time drawing. Ah well.
Also, yes, flowers can look like things, especially close up. It's been pointed out before, quite famously. So you can keep it to yourself.

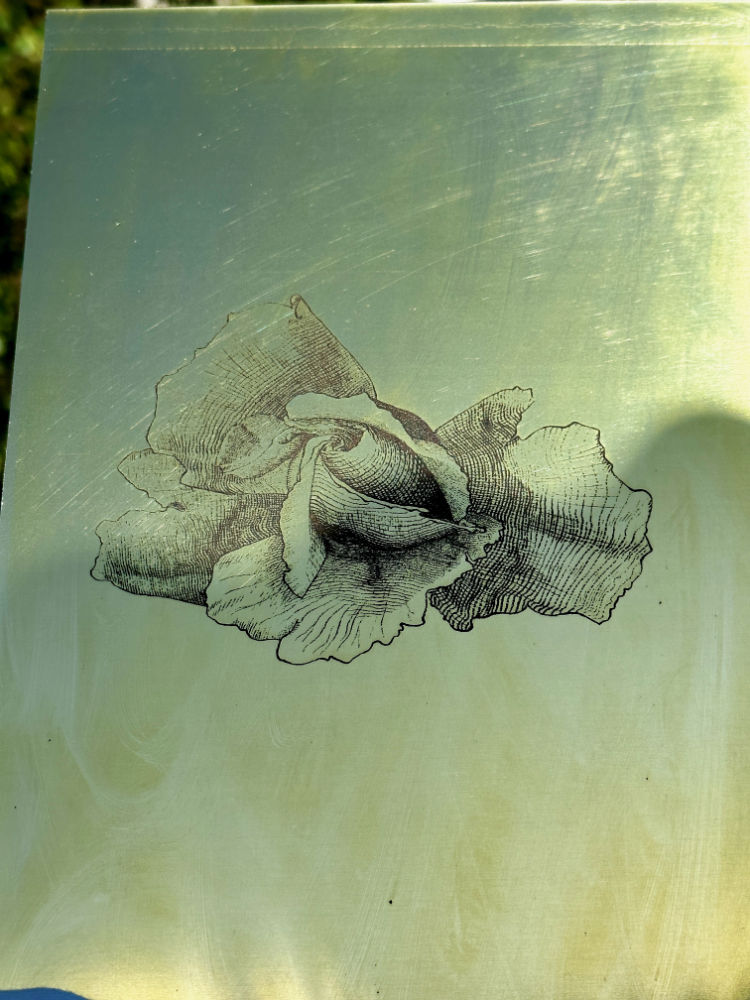
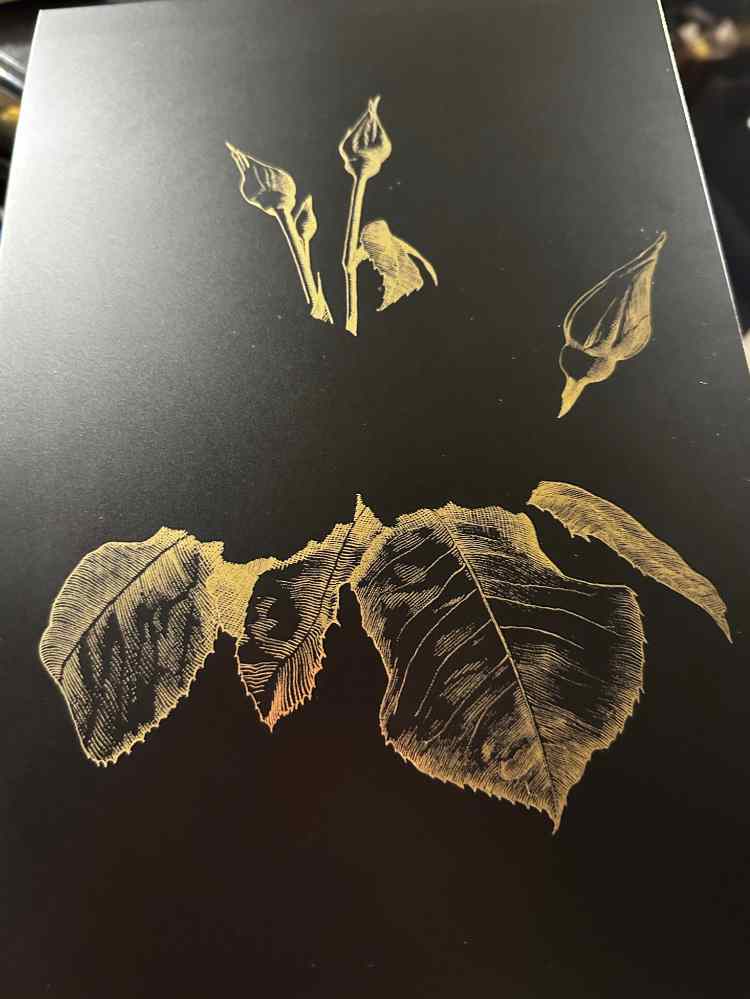
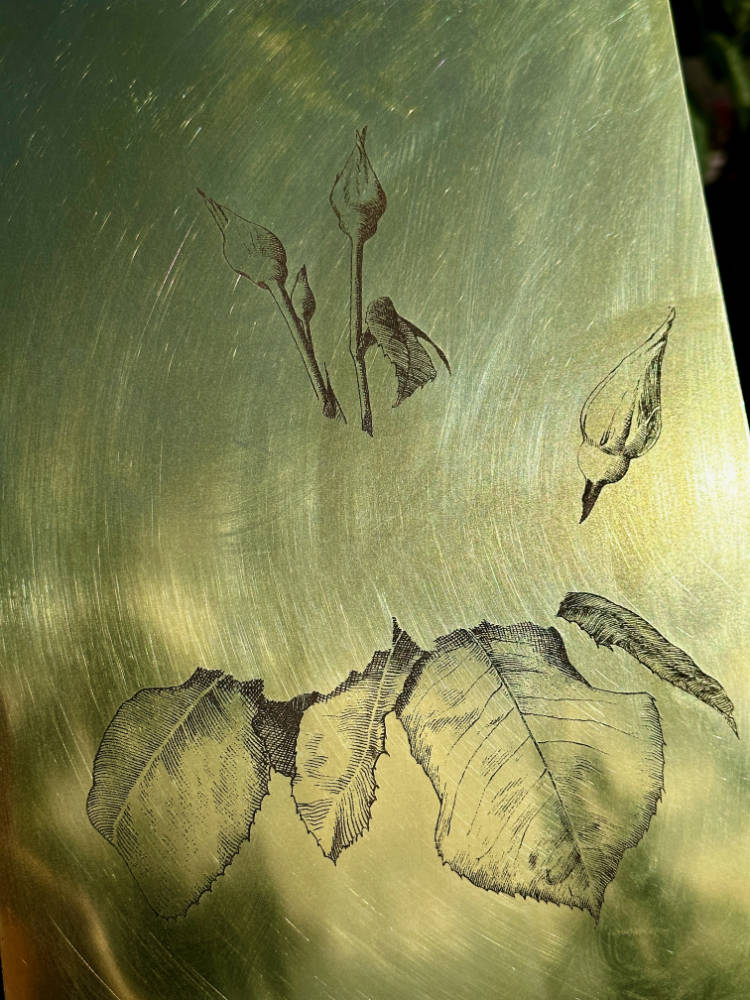
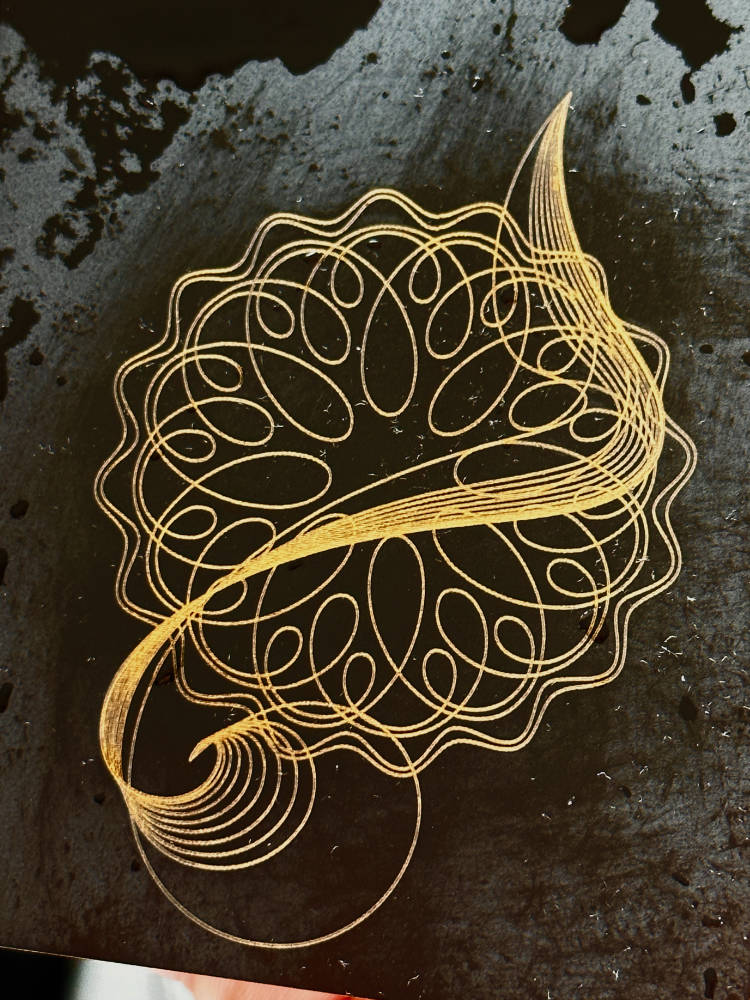
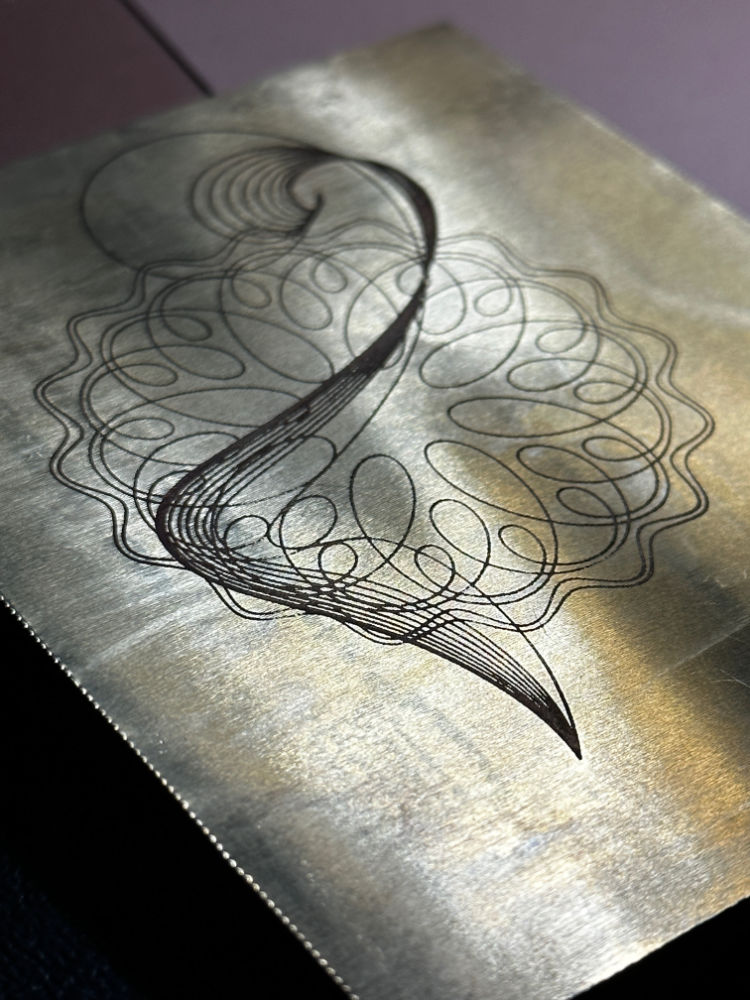
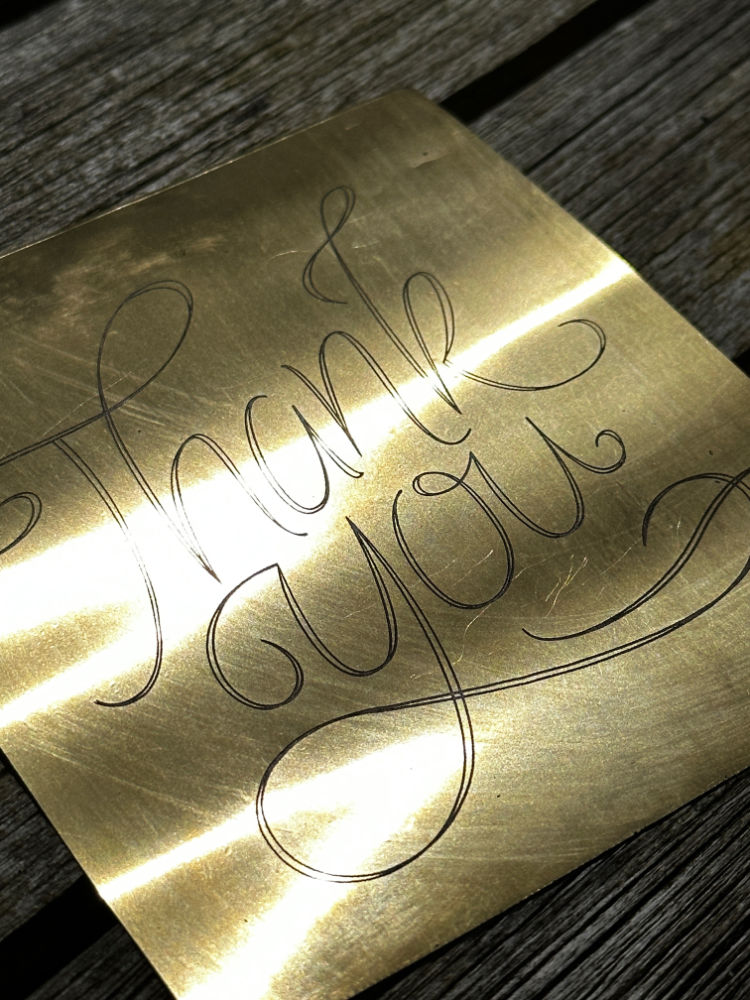
I should say at this point I am going to do a brass plate of the whole image and not etch it, just leave it as black painted brass with the image shining through. I really like how these plates looked before I etched them!
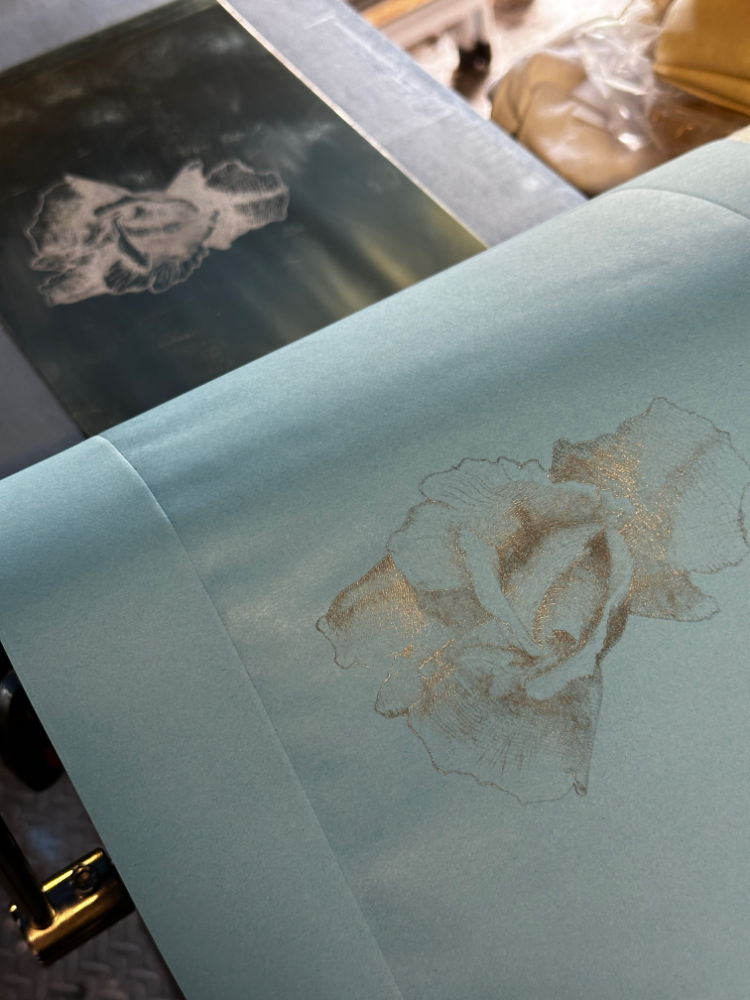
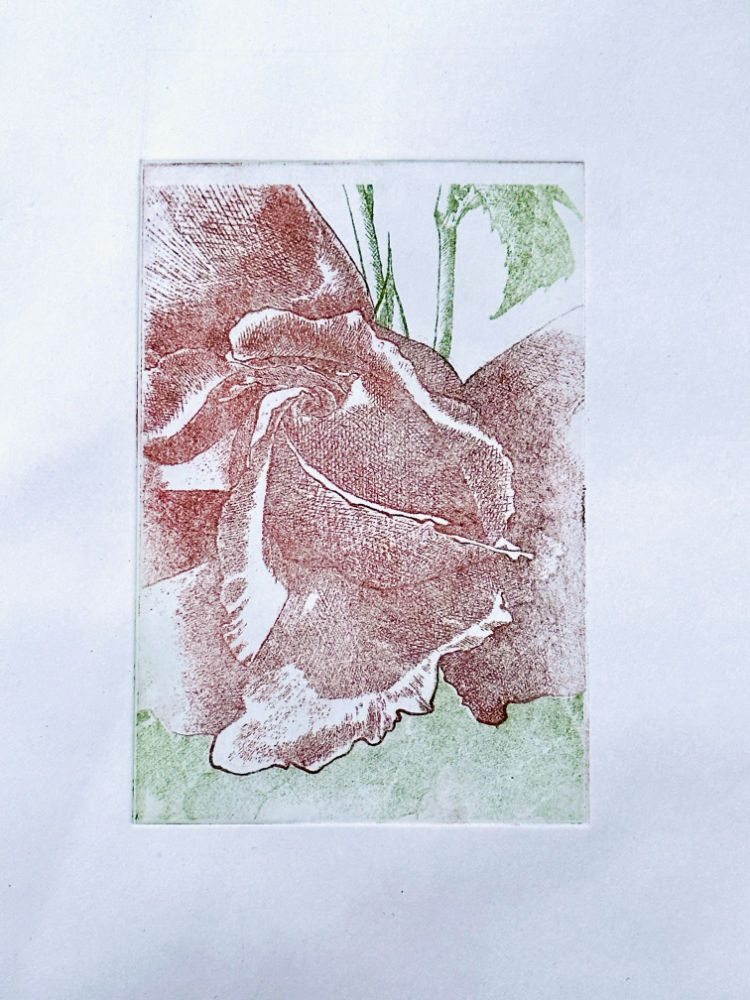
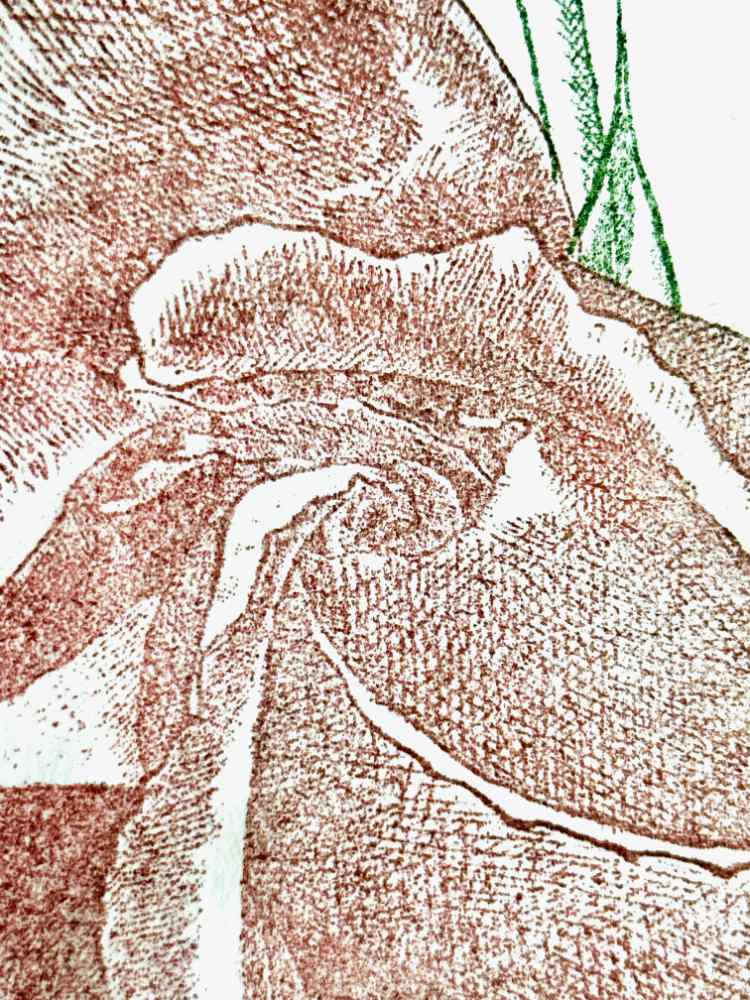
Remember me saying about the blue in a previous print? Well the pinks and greens in this print were very light, but they came out very dark. I tried and tried, and I did the image on the left - it's not as clear as it could be with the light shining off it but that was pure white ink, and it came out grey. The issue here is the brass is reacting with the ink. The brass I used before was obviously more stable! This thicker stuff… not so much.
So, the next step with that image is to try steel. That's in a future post.
In the meantime, I tried another approach, using acrylic sheets.

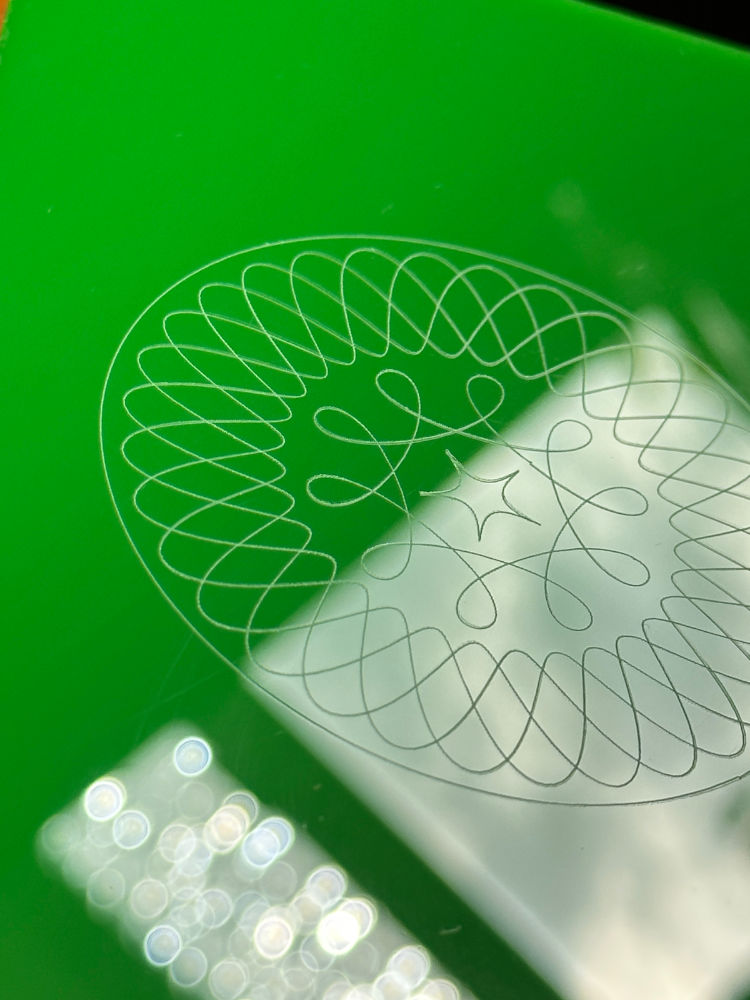
When I first bought the laser cutter I got some sample pieces of acrylic (Perspex) in various colours. I have a diode laser which is blue, and it can only cut through certain colours. So, I have these sample sheets sitting around in case of future projects, like for example, making printing plates.
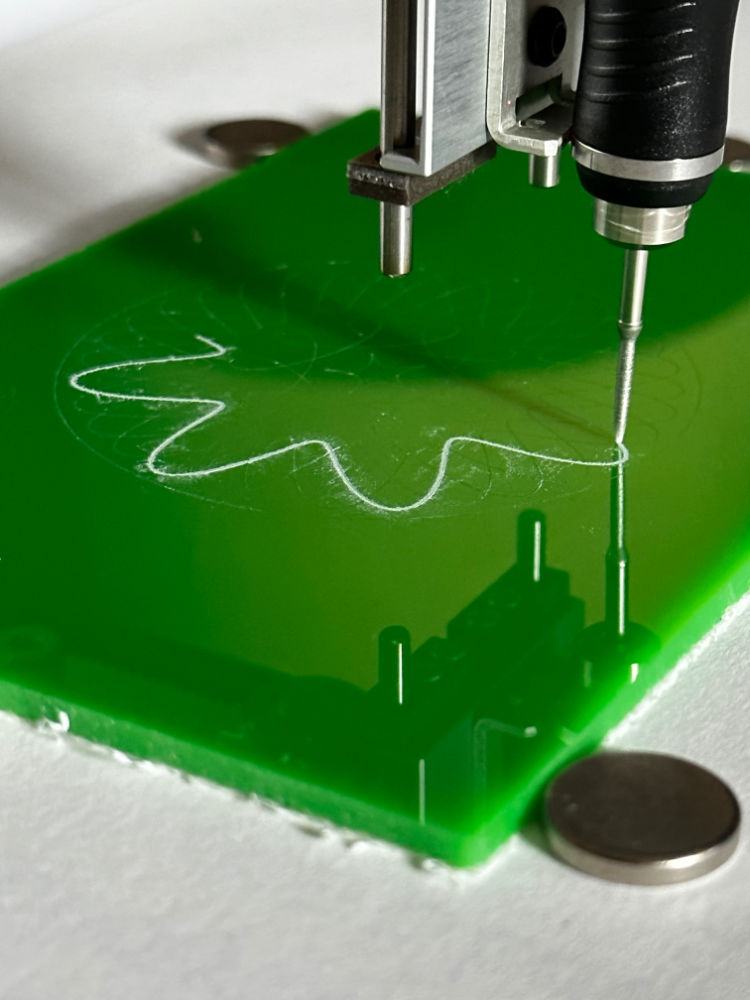
I have also got a battery powered etching tool. It's like a Dremel but lighter and cordless. As I've written here a few times I also have an Axidraw (a pen plotter). I am gradually assembling a workshop of tools here!
I used the 'jumbo pen' clip of the Axidraw to hold the cutting tool and held a piece of acrylic in place with magnets and had a go cutting out a test pattern. It went really well, creating a plate that held just enough ink to make a faint print.
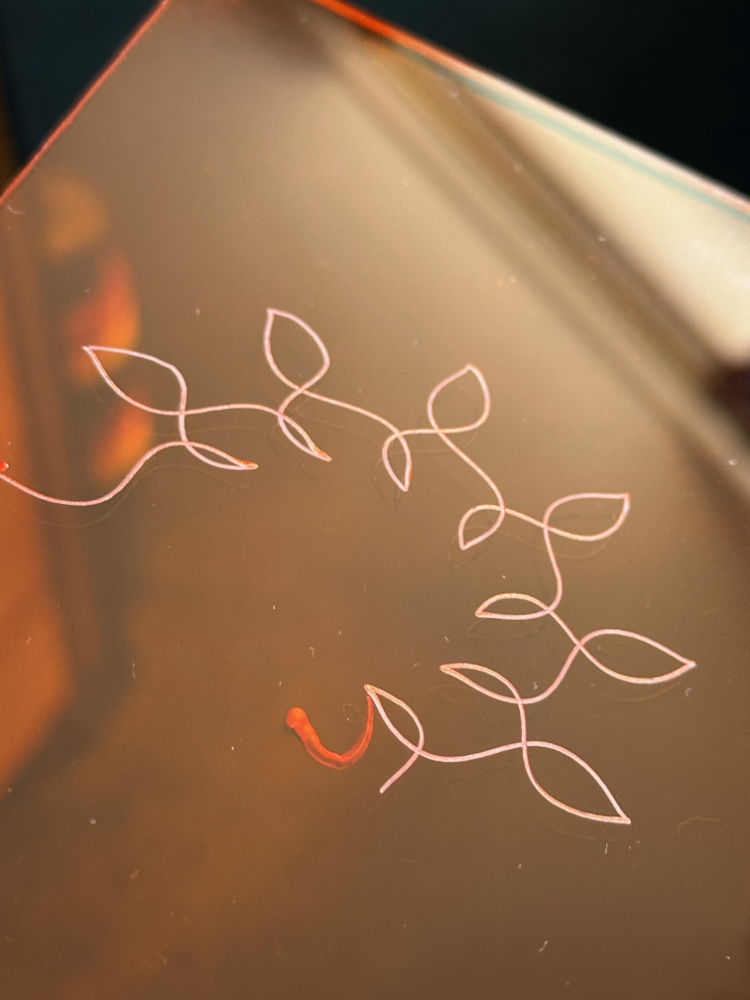
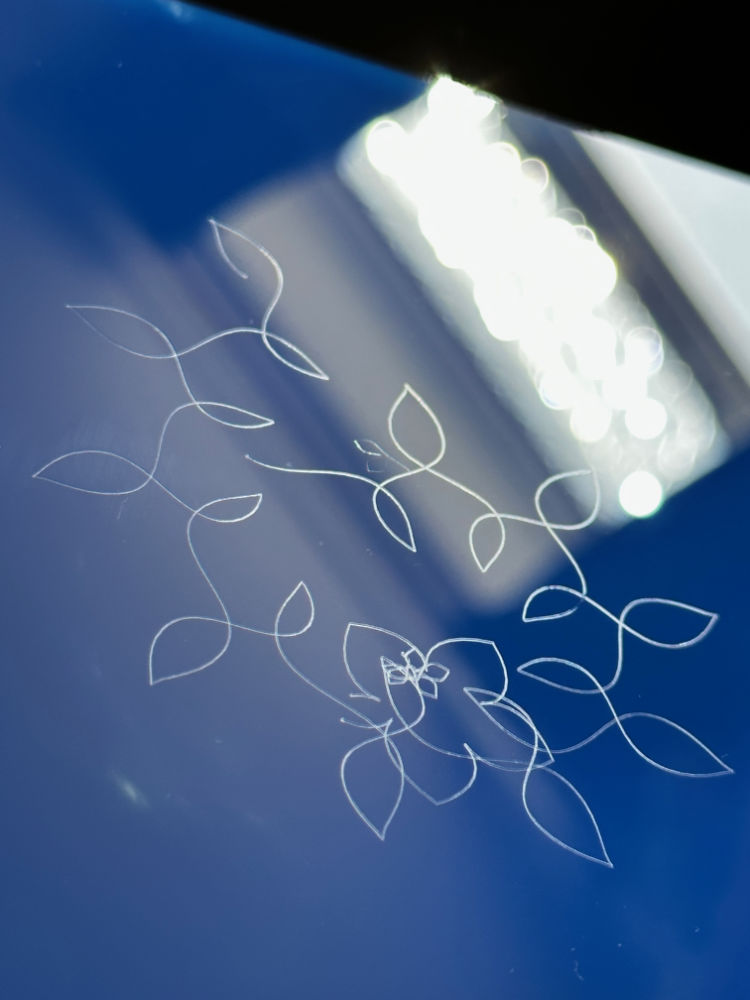
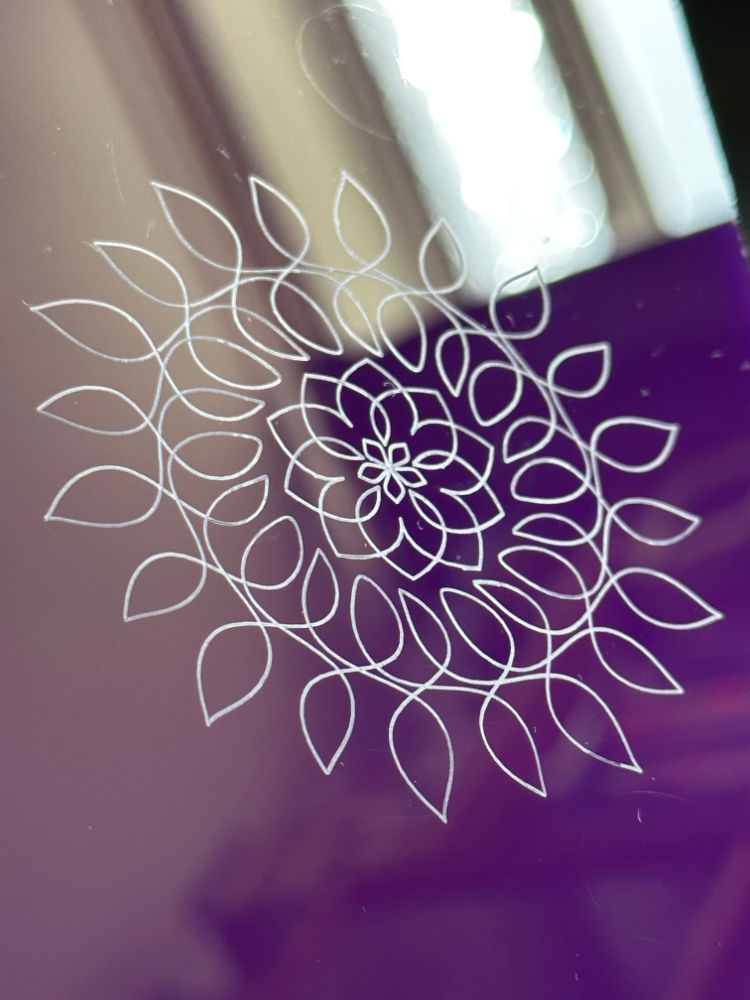
I tried a few other sheets of acrylic and a few other etching bits, with varying success. Transparent acrylic is softer and the etcher just drilled into it and got stuck, dragging the plate around. I quite liked the pattern in the blue attempt above. The purple one looked like a good plate but because I'd used a wider bit it wouldn't hold enough ink to make a print. It needs to have sharp edges.
So that's where I'm up to. I have some steel sheets that I'm going to try with the rose drawing again. I would like at least one clean print from it that I can frame and say, "There! I did it!"